kitchen designer

Greenwood Village Kitchen

This new home in Greenwood Village belongs to one of the nicest families I've ever met.  This kitchen is a true reflection of their style.  It is warm and inviting, but feels elegant and sophisticated at the same time.  When I first met them in 2012, they had yet to break ground on this house. Here are a few of the highlights in this kitchen:

  • Originally, the sink was in the southeast corner of the kitchen.  It was in an area that I felt would become a choke point, especially for a family of 5.  I moved the sink to the East wall and added an arched window that was not previously there.

    I incorporated a traditional Rohl farmhouse sink under a new arched window for dramatic effect.

  • The North wall of the kitchen (which is the wall with all the brick) was really lacking any balance.  I moved the 48" dual fuel Thermador range onto that wall and then flanked it with symmetrical cabinetry.  All of the top boxes are individually lit with LED puck lights.

The herringbone pattern insert of bricks above the range breaks up the standard brick pattern in a way that is interesting.

  • I contrasted the white perimeter cabinetry with a black paint rub-through finish on the island.  The implied weight of the finish provides a visual anchor for the kitchen.

Interior Intuitions Brookside. 6 Hi Res

  • Lots of fantastic storage inserts...

    Knife Block

    CLICK BELOW TO SEE ALL IMAGES OF THIS PROJECT

[gallery type="rectangular" ids="889,884,891,879,882,887"]

Dramatic Kitchen Shines in this Mountain Retreat

Every once in a while, a project comes along that is really special.  Now, that's not to take away anything from any of my other remodels or new construction projects - but sometimes you are lucky enough to be part of a project in which all of the involved parties have an unquenchable thirst to build something that pushes our creative boundaries in the quest to provide a truly unique space.  This house, this kitchen is definitely one of these spaces, and it shows through in every room of the house.  I was hired by the interior designer on this project to provide the cabinetry design for this kitchen.  We started from scratch and built something that we had never done before.  I'm quite proud of the result. You'll notice that all of the cabinetry has a reflective surface in the door.  I had to work with our cabinet shop to create a new door that would accept both a bronze glass panel and a cherry veneer panel in the door.  It wasn't easy but we figured it out and the end result is beautiful!  The Sub Zero housing is encased in a floor to ceiling column that is cladded in a natural stone.  The housing itself had to be completely re-thought from our standard because of the door swings on the refrigerator, hence the 135 degree angles on the pilasters that anchor either end of the housing.  Above the fridge, we placed a piece of Lumix Quartz (same as countertops).  The result is a piece that mimics a work of art instead of an appliance.

If you are interested in working with any of the other professionals associated with this project (interior designer, architect, builder), please get in touch with me.

[gallery type="rectangular" columns="2" ids="714,715,716,717,718,719,720,721"]

12' Solid Wood Island Countertop Anchors this Kitchen

This spectacular island countertop is solid cherry wood. It measures 2-1/2" thick x 140" length x 45" width.

There are several radius details along with arcs on both ends and custom cutout for the 36" gas rangetop and integrated downdraft.  Needless to say, I spent a lot of time designing this piece and spent more than a few restless nights worrying about the details of installation and integration to the island.  Fortunately, our shop did a fantastic job creating the top and it turned out stunning.

But enough about the island countertop.

The design of this kitchen evolved over time.  We began with a standard galley kitchen and decided to open up the kitchen into the main living room, which ended up being a great idea.  There is more than enough room for two chefs to work simultaneously here and not bump into each other.  The Sub Zero armoire is 9' tall and mirrors the height of the tall pantry / microwave cabinet on the opposite side of the room.[gallery columns="2" type="rectangular" ids="669,670,671,672"]

Clean Traditional White Kitchen

These young clients preferred a throwback to traditional style when they decided to purchase and remodel an East Wash Park Bungalow.  From the very beginning, these clients were open to all sorts of ideas.  We eventually settled on a white kitchen with contrasting blue island.  The lighter colored flooring, neutral backslash, and carrera marble countertops all contribute to a very open and light feel.  Casual and refined; perfect for this growing family of four to eat dinners together or entertain guests. I teamed up with designer Megan Kane and the result is beautiful and functional.  Appliances are by Thermador: Integrated refrigeration and freezer columns, a 36" range, and built in microwave.  The bar area (not pictured) includes an ice maker and under counter beverage center.

[gallery columns="2" type="rectangular" ids="641,642,643,644,645,646"]

Crown Moulding Sketch

Here's a sketch of a crown moulding detail in a project I am working on.  This particular moulding has three steps to it.  The top rail of the cabinetry is extended to 6" total height, leaving 4.5" to apply S4S...Through application of three pieces of square edged moulding we are able to produce a four step crown. Best part about this detail is the stainless steel banding that we are adding to the whole moulding stack.  A piece of stainless steel, 1/8" thickness will be added after the mouldings are installed to give an added dimension to the cabinetry.


Kitchen Lighting Ideas

Kitchens and baths really need great lighting in order to be a success.  Don't make the mistake of leaving this detail out of your plans until it's too late.  So before you finalize everything in the planning stage, make sure that you have taken these three things into account: 
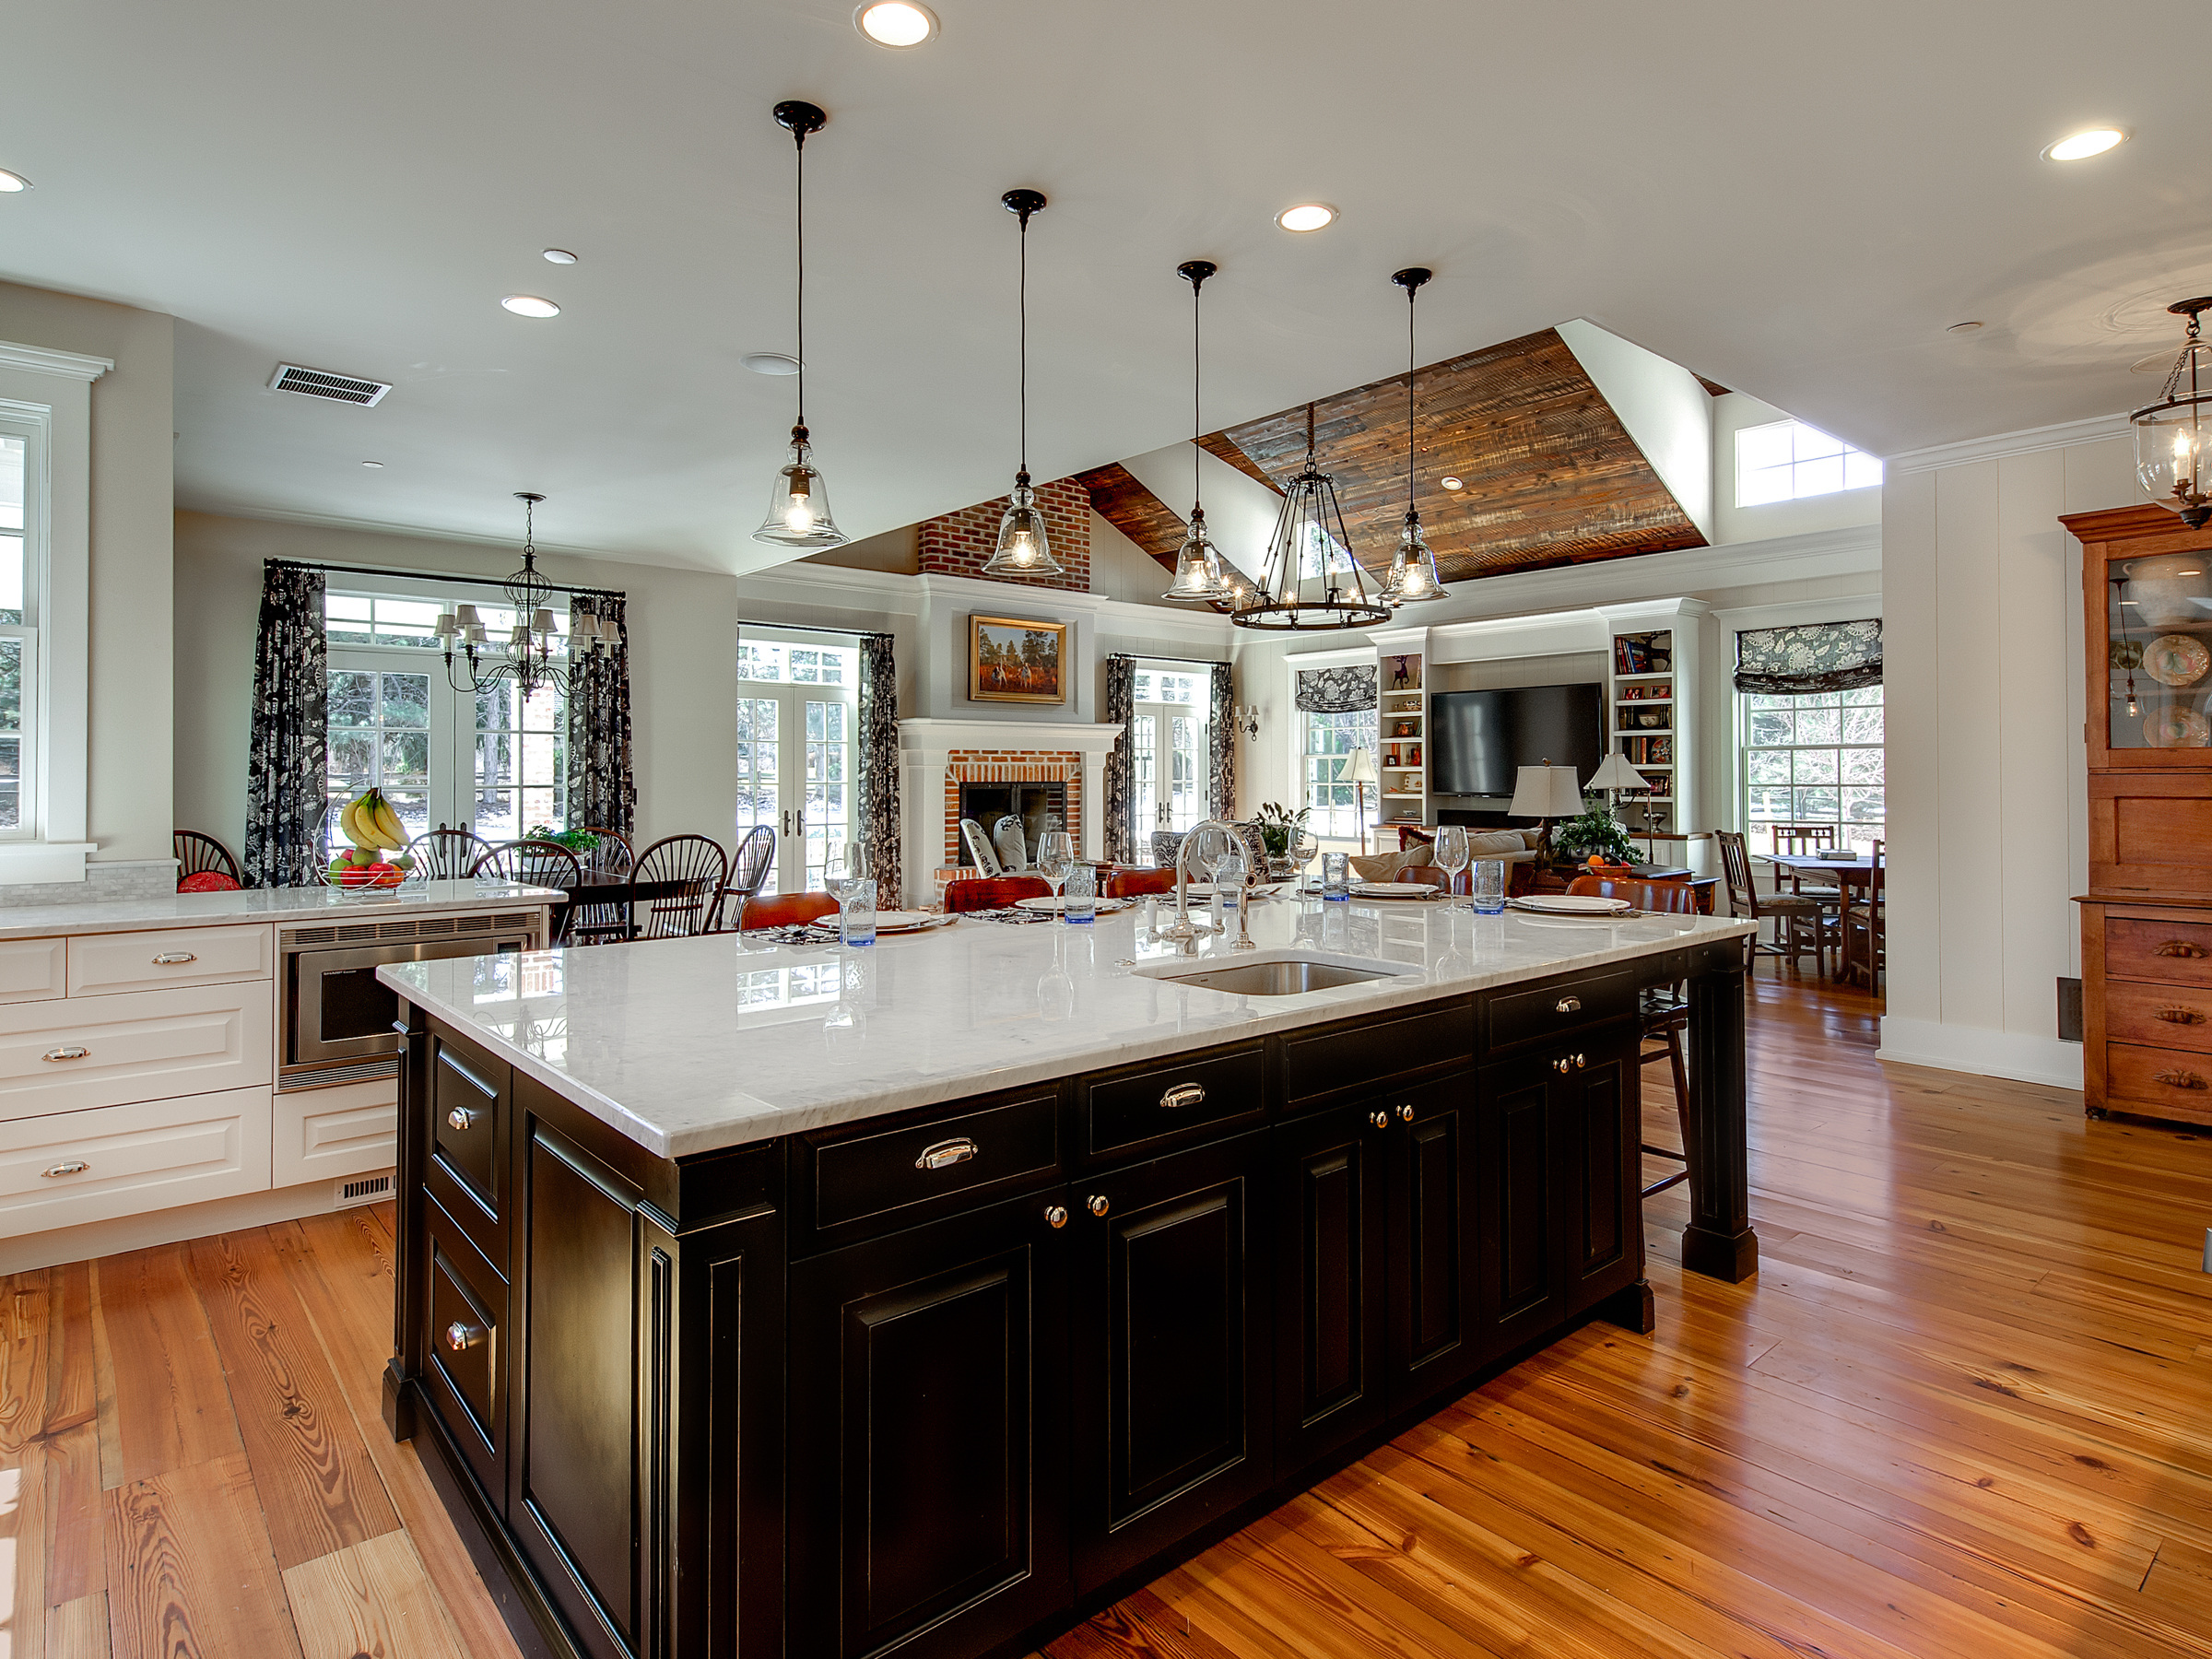
1) Where and what type of GENERAL lighting do you want in the kitchen, i.e. - recessed cans, pendants, etc...

2) What type of TASK lighting do you need to perform your daily tasks such as meal preparation, coffee making, and cleaning?

3) What type of ACCENT lighting do you want, if any at all?  This can include interior cabinet lights, cove lighting, etc...

4) What kind of bulbs do you want to use?  Do you want halogen, xenon, LED, or flourescent undercabinet lights?  What kind of bulb do you want to use for your recessed can lights and fixtures?

GENERAL LIGHTING

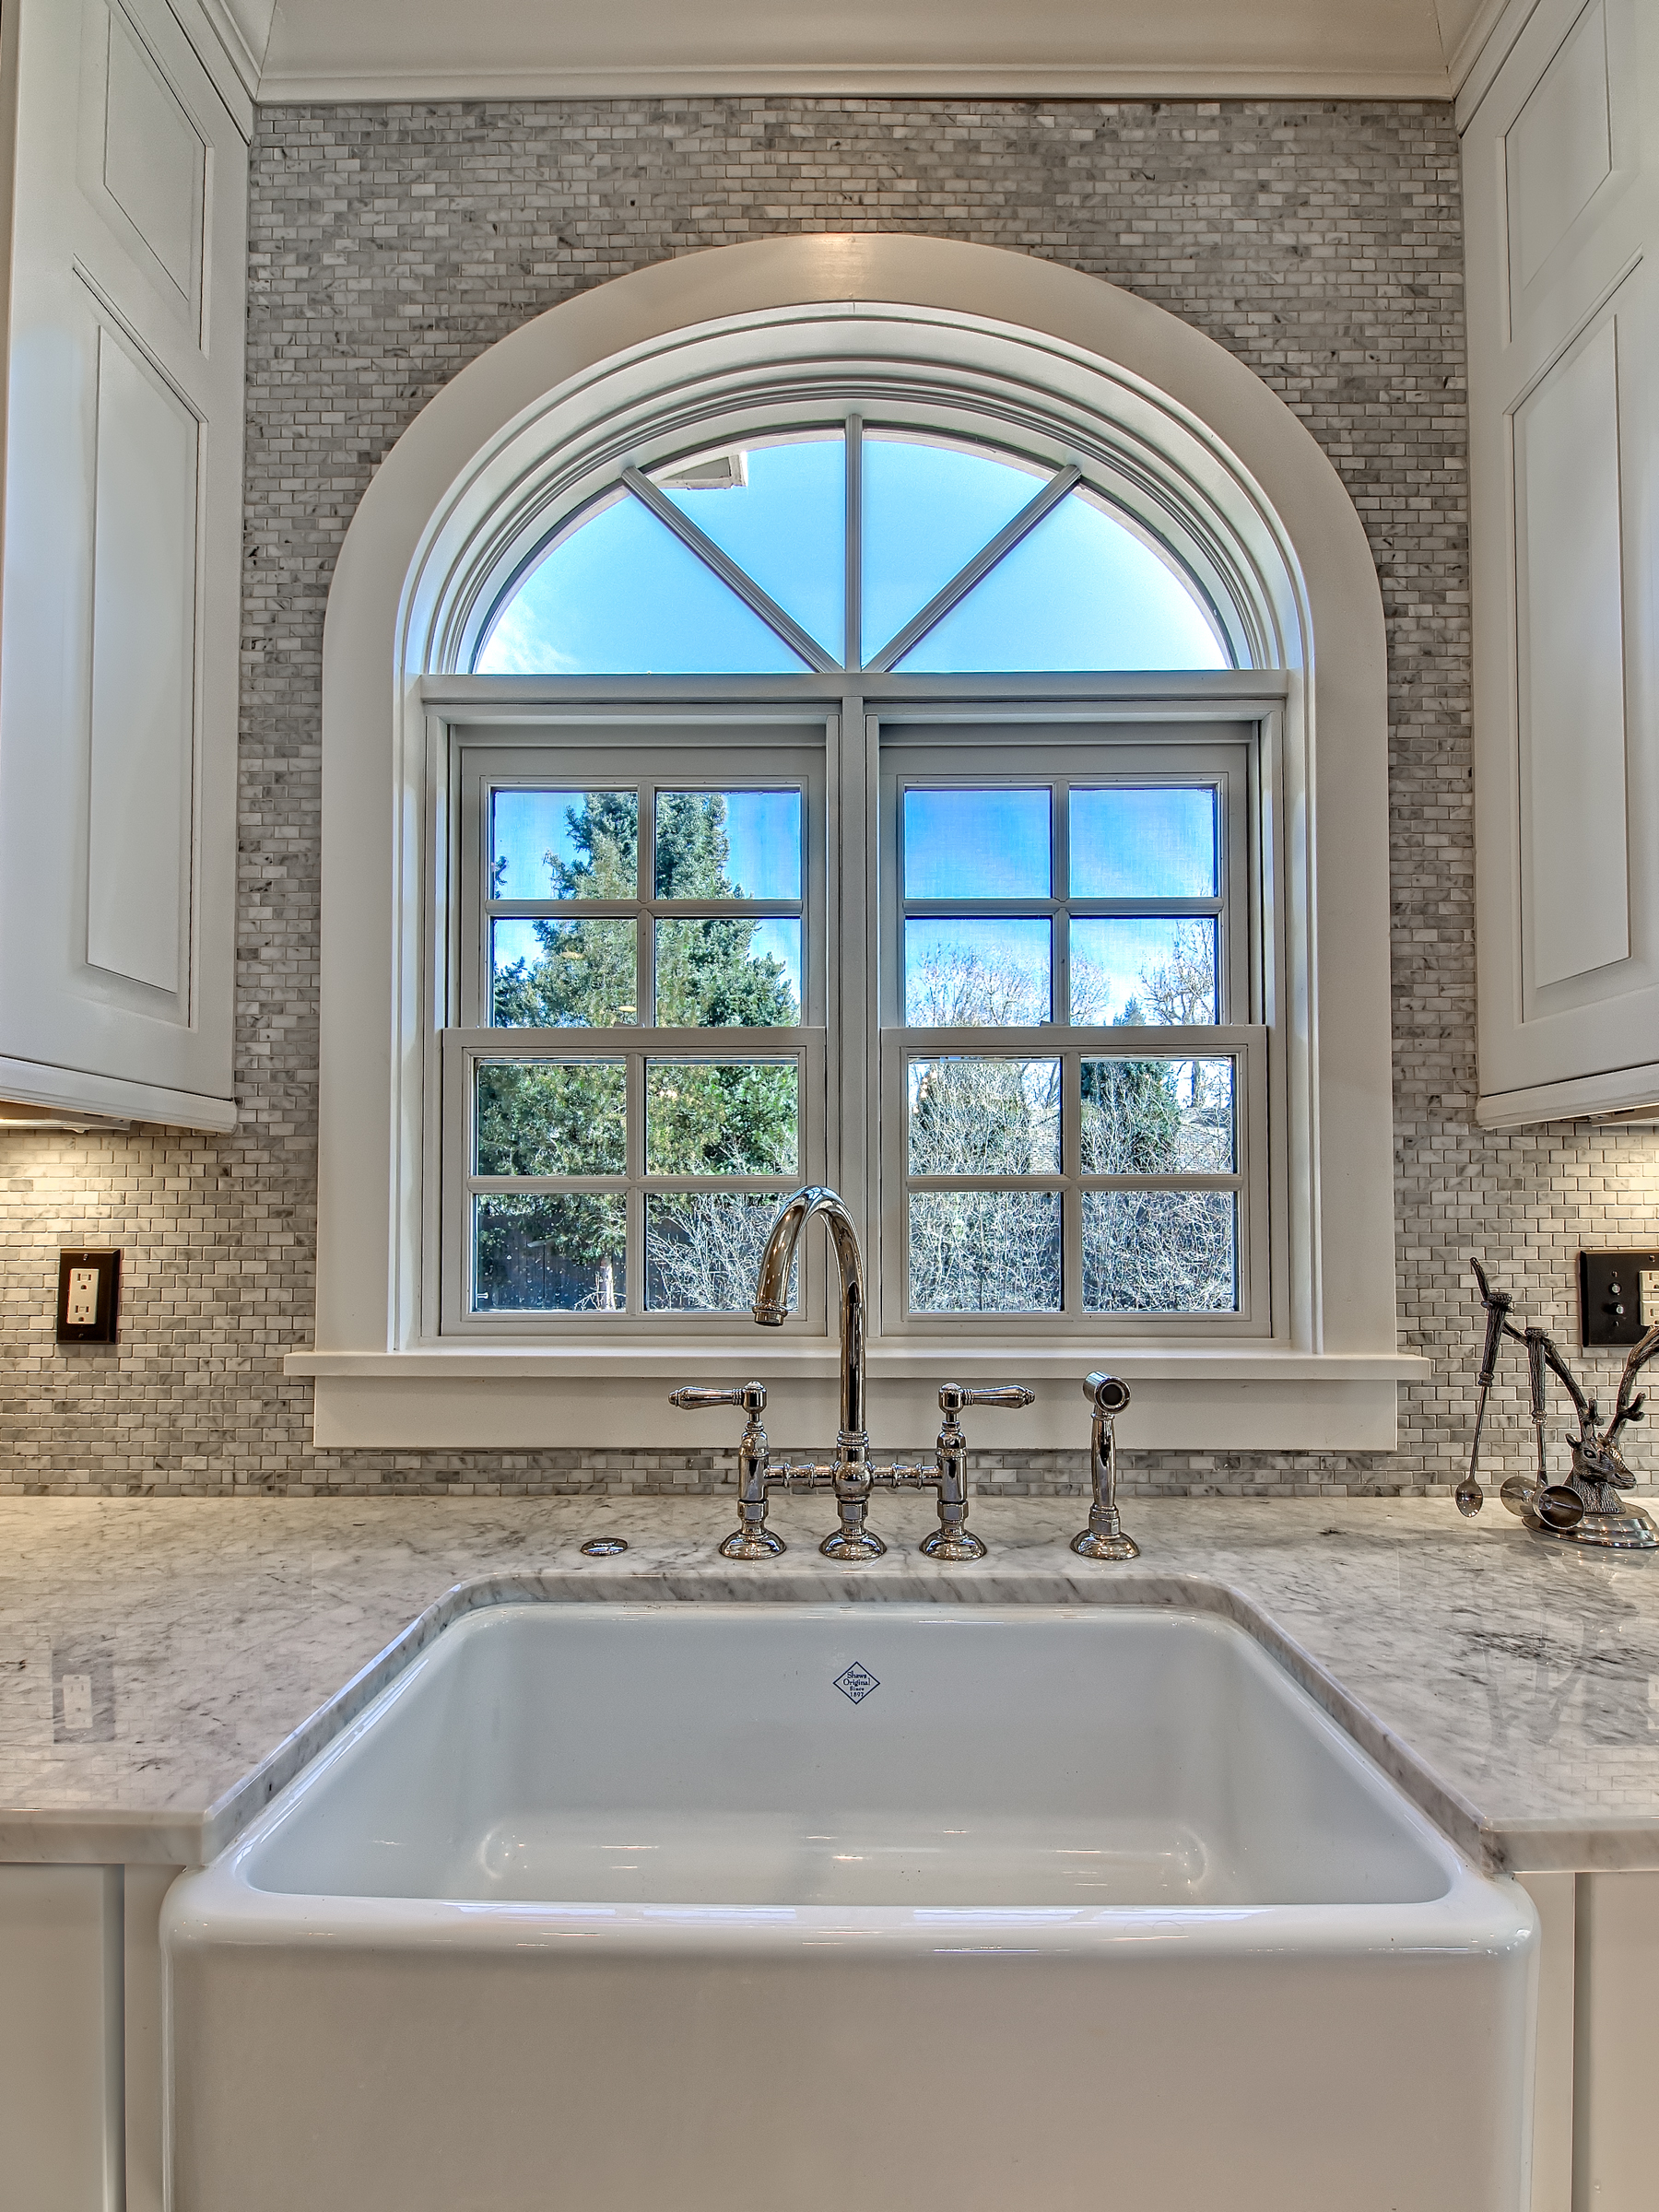
The first thing to do is to gauge how much natural light from windows and skylights is available.  For instance, during the planning phase of my own kitchen remodel in the summer of 2011, we decided that there was just not enough natural light in the kitchen.  Our kitchen is situated in the northeast corner of the house (read: least amount of sunlight) and the two windows to the kitchen were shaded by the roof over our covered deck.  The first thing we did was add two skylights to the roof to increase the amount of natural light.  It was a bit costly up front, but as a result, we never have to turn our lights on during the day.  Over the life of our stay in this home, we think the energy savings from not running lights during the day will effectively pay for the two skylights.

If your kitchen is really dark, considering adding a skylight, or even a window.

After gauging your natural light, determine how much general lighting you want.  It's best to have 4" or 5" recessed can lights spaced about 48" apart from one another over the countertops, and a few well placed recessed can lights in the center of the kitchen.  4" cans cost a little more than the standard contractor-grade 6" versions.  However, the smaller version definitely is a more pleasing aesthetic look.  Don't forget to plan where and how you want to switch them on and off.  If you have multiple entrances to the kitchen, you definitely want these lights to be switched at the main entry points using a three way switch. It's also a great idea to install a dimmer switch at one location so you have the option of lowering the light output.  There are no rules except one:  always try to center a can light (or hanging pendant) over the main sink.

Check out the difference a bigger window and removal of covered porch made in this kitchen.

TASK LIGHTING

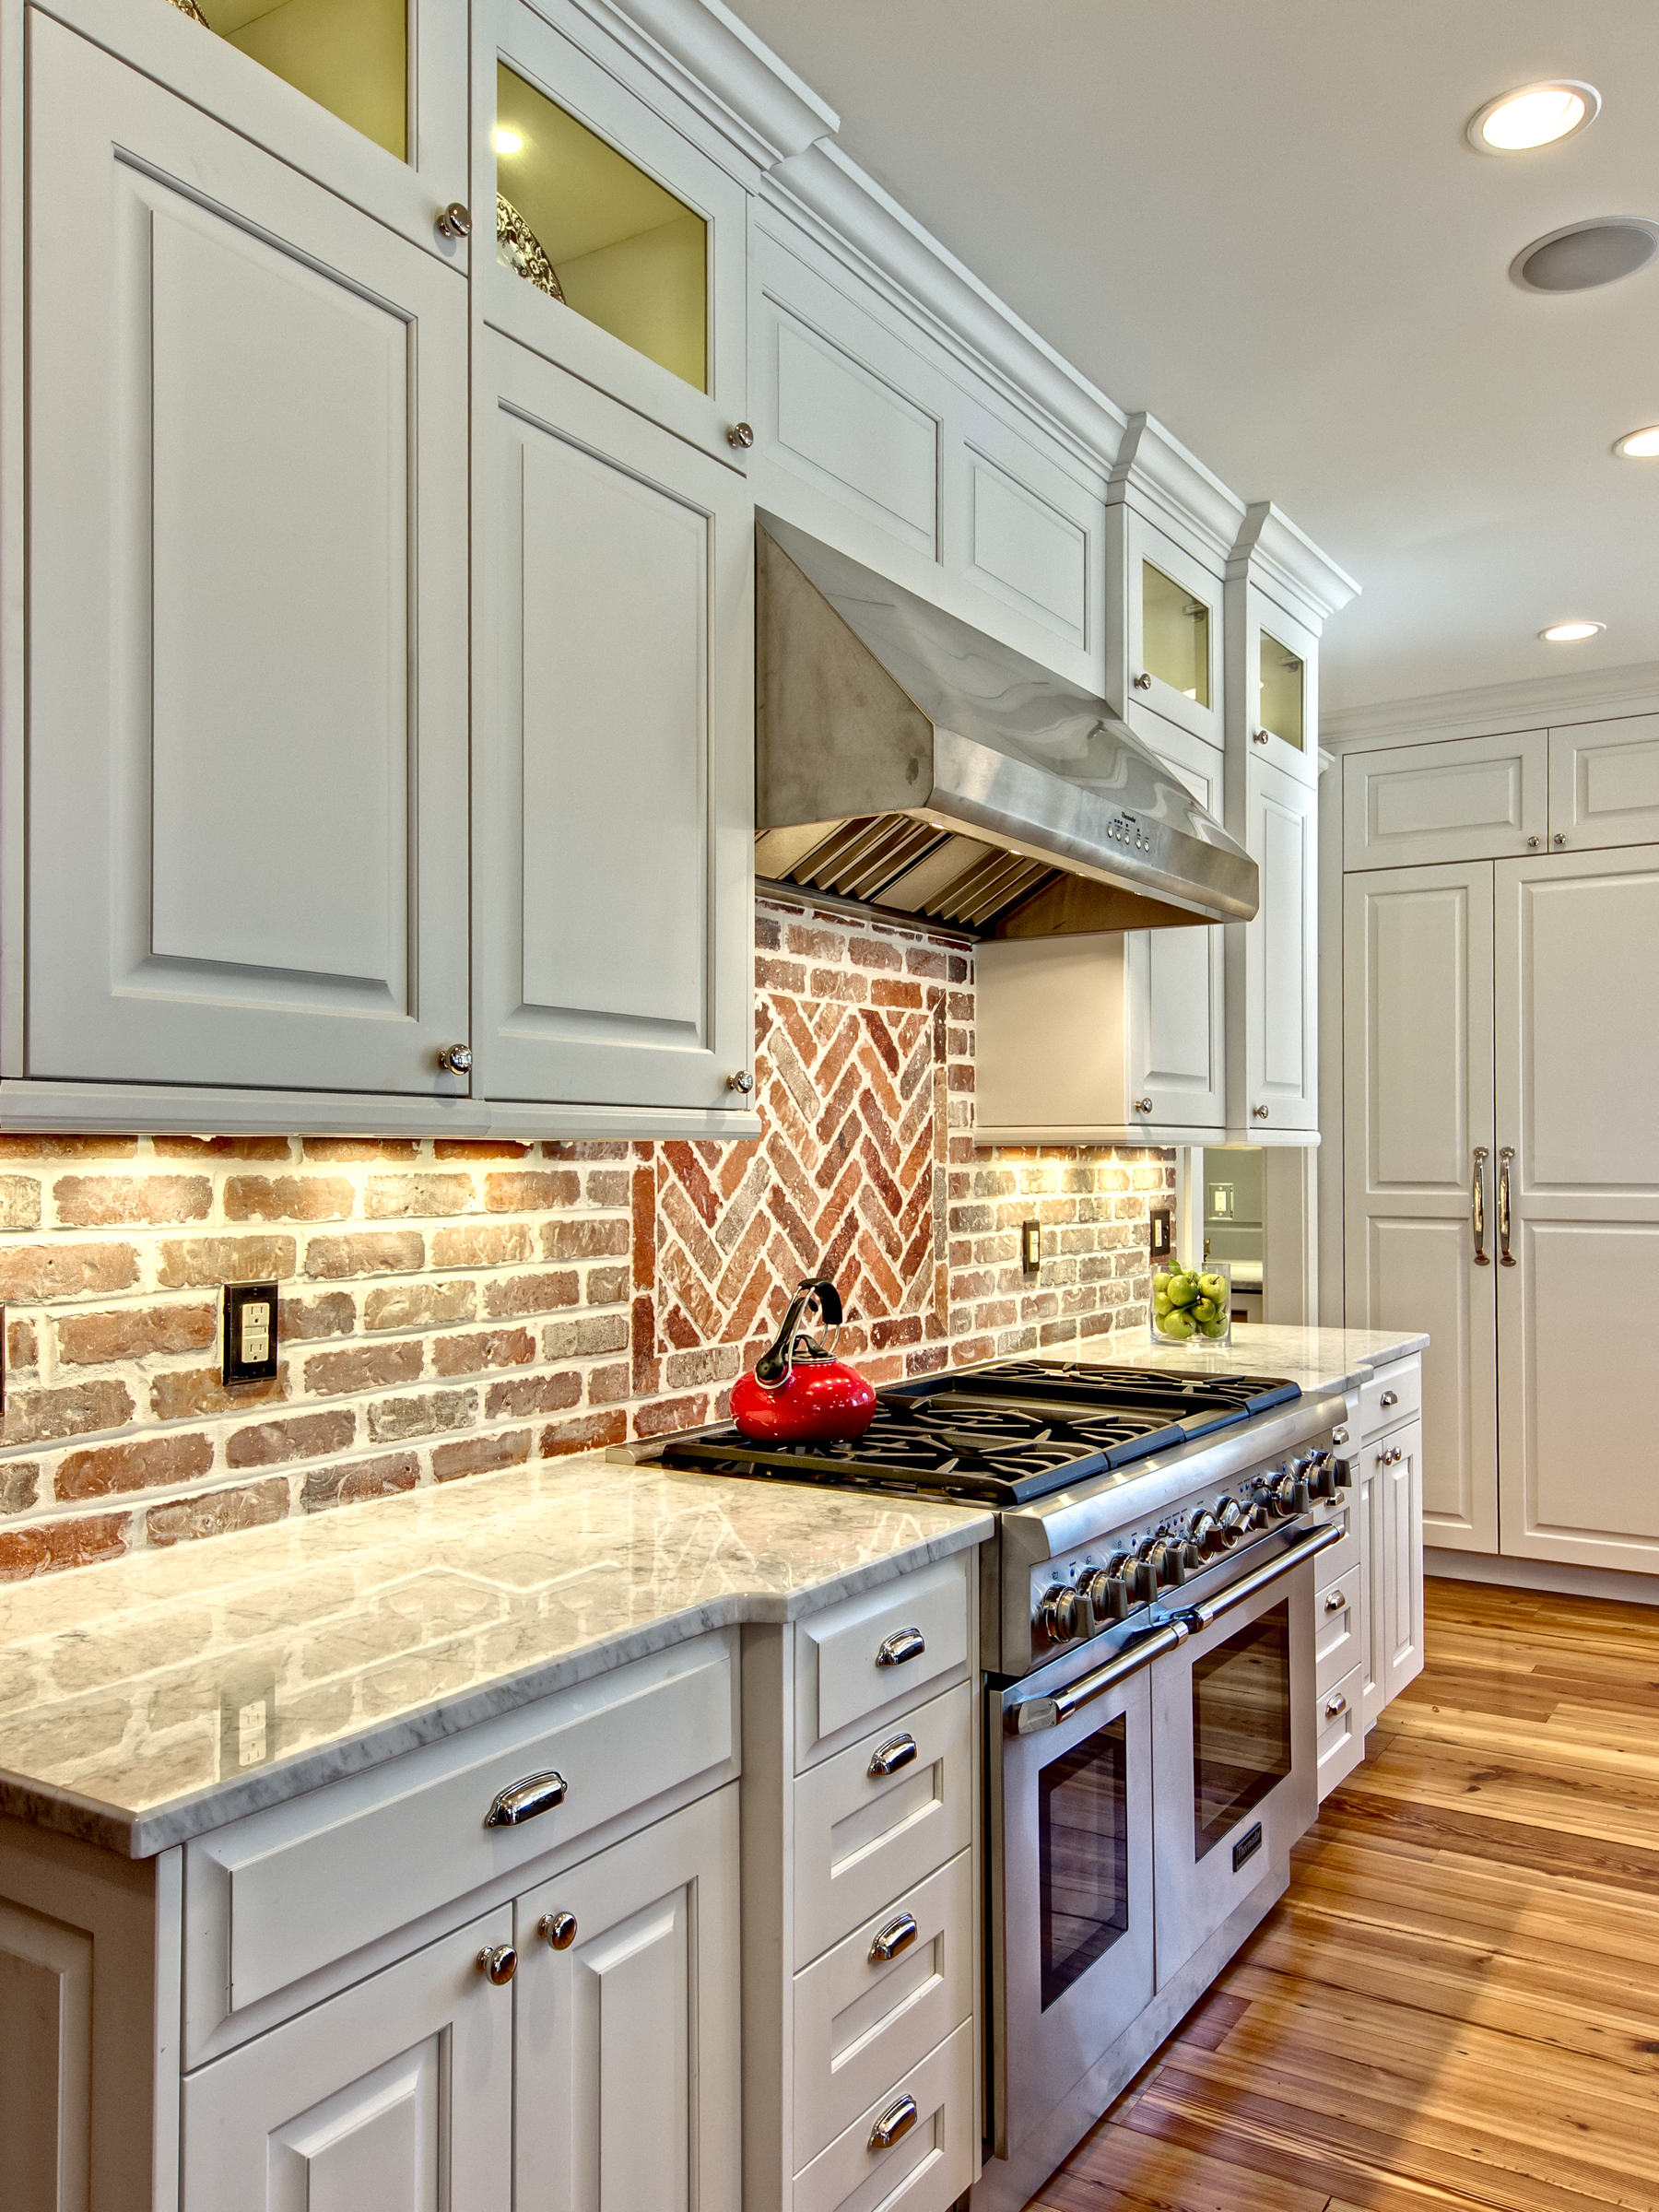
This refers to the lighting that you use to perform daily tasks.  Cleaning, making meals, chopping broccoli, bathing your child in the sink...etc.  No matter how great your general lighting is, you'll definitely need some task lighting.  The most important is under-cabinet lighting.

I recently came across this light, which I think is great.  It throws off a ton of light and it's an LED, so it's really energy efficient and it will never emit any heat.   Traditionally, LED lights have been much more expensive than Xenon or Halogen.  However, just as with all technology, as the number of manufacturers has increased, production costs have come down.  This one is quite affordable and I have it specified for a large kitchen in Vail, which will install in June.

Place your undercabinet lights at the front of the cabinets, not at the back.  This will produce the best result and better distribute light on the counter surface.  Most undercabinet lights come in several different lengths, so you should be able to find one for most every cabinet width.

One important caveat to LED lighting: It's what you call "low voltage".  The 15amp circuit that feeds the undercabinet lights is not wired directly into the light.  Instead, a "driver" or "transformer" is needed to reduce the voltage prior to feeding the light.  It can be complicated, so it's best to just specify the type of light you want, and then hand it off to the electrician to figure out the rest of it.  There are several restrictions on length of cable used and number of lights allowed per driver.  A good lighting store should be able to sort you out.  Just don't expect to get answers to these questions from Home Depot or Lowe's (I really prefer Lowe's - much better don't you think?)

[polldaddy poll=6071277]

ACCENT LIGHTING

Accent lighting is what usually sets the great kitchens apart from the ones that are just "good".  It's a well placed fixture or an interior light behind a glass door that can really make a space pop.  For these types of applications, you're really not going for a light that is super bright...You're looking for something that just accents a desired space, such as the interior of a cabinet, or the space between crown moulding and a ceiling.

Think about whether or not your cabinetry will join to the ceiling, or if it will stop short of the ceiling.  If your crown moulding stops short of the ceiling, it might be a  nice idea to add some rope light on top of the cabinets for a cool ambient feel.

On the "way out there" spectrum, translucent stone is now also being back lit for really dramatic effects.  Check out this picture of a quartz countertop which has been backlit from beneath:  

Limestone Backsplash Tile

Found this little guy and immediately started looking for a project to use it on.  Paired with Typhoon Bordeaux Granite, it's going to be a really fantastic backsplash.  We're using it in a current project as we speak. It installs end of next week.

Three Exciting Projects Beginning Soon...

Just as a couple of projects are coming to a close, a few are starting to begin... A kitchen remodel in Centennial is just about complete.  We've got a few finishing touches, including a 2-1/2" thick walnut and maple checkerboard butcher block top, that still need to be installed, but the kitchen is fully functional at this point.  The general contractor has done a fantastic job keeping to schedule, and we expect to be out of there before the end of the month.

A seperate kitchen remodel in Cherry Creek is just now beginning to take shape.  The granite and appliances are installed.  Hardware is going on soon, and the final steps to completion are just a few weeks away.  I can't wait to photograph the finished kitchen, completely staged - the transformation is amazing.

On to the new...more specifically new construction.  The Flats, in Cherry Creek North, a multi unit luxury loft development, is just about ready for kitchen and bath installation.  The framing, plumbing, and electrical is complete.  Flooring and drywall will be added in the next few weeks and then the real fun begins when we start to organize and manage the installation of six custom kitchens, six master bathrooms, six guest bathrooms, laundry rooms, butler's pantries - all simultaneously!

Another new construction project delivers next week.  One of the area's most respected builders is nearing installation phase on a new custom build in the Observatory Park neighborhood of Denver.  I have been collaborating with the client and builder since JULY of 2011 on this project and I'm so excited to finally see it come to fruition.

Last but not least is a gorgeous bungalow remodel in the Wash Park neighborhood of Denver - also delivering next week.  Talented designer Megan Kane, of M Street Denver, referred me to the homeowners to help them design and space plan the kitchen, bar, and bathrooms and specify the best cabinetry for their project.  Of course, I'll keep you posted with pictures of the project throughout the install.

Sorry, no pictures today!  Don't worry, I'll get some installation shots up soon.


How to Build Wainscot Paneling

Wainscot paneling is something I used to do a lot of when I lived in the Northeast.  It's found in many older traditional homes, and is often replicated in remodels and new construction to achieve a warmer feel for a space and add interest to otherwise plain walls. Wainscot comes in many different heights, styles, and variations.  It can be created with a variety of materials, but wood is mostly used for the construction.

Originally, wainscotting was used in 16th century English homes to combat rising dampness.  England has a very humid and damp climate, and this was one method that early builders used to fight mold and mildew that would rise up out of the ground and infiltrate the lower portions of walls in homes.

Now, it is used mainly by designers and builders to adorn the walls of upscale homes.  It is traditionally painted or stained and, like I said, can come in many different variations.

Steps to Create Wainscot

1.  Rip your horizontal rails to the desired width.  If you are planning on a 3" exposed rail and you have a 4" baseboard, then your rails should be ripped at 7", as the rail will be applied first and the baseboard attached to it, flush to the floor.  Use 3/4" thick MDF (medium density fiberboard) or paint grade plywood if you are planning on painting your wainscot.  If you desire a stained wainscot, then take care to select only the best boards for your material, as the stain will accentuate any grain patterns or defects that are found in the wood.

2.  Mark stud locations on wall.

3. Draw level lines at the desired heights and then nail your wainscot to the wall at the locations where you previously marked off studs.

4.  Next, mark off your desired locations for vertical stiles.  Nail these into place as well, and be sure to apply ample wood glue to the ends that will abut the horizontal stiles and rails.

5.  After you have nailed your stiles and rails to the wall, you'll have a pretty good idea of what the end product will look like.  Miter your chosen panel mold or inside profile into the panels, per your design.

6.  Add your chair rail and cap mold.  Here's where you can get creative.  There is no set way to build wainscot.  Take your time designing and drawing before you start any nailing or building.  Draw the panels out on the wall to ensure that you like the size and shape of them.

7.  Finally, all of the nail holes and joints will need to be filled with putty and sanded to a smooth finish.

8.  Your wainscot will need to be primed first, and then painted with a minimum of two coats of paint.  I recommend spraying the paint, as brush application will take a very long time, and the sprayed finish gives a very uniform even coat.

Restoring a Denver Square...

What's  a Denver Square you ask?

Well, it's a familiar type of home to us that live here in town.  The Denver Square gets its roots from its shape.  Basically it is 4 square rooms on the main floor and four square rooms on the second floor.  The Denver Square style of architecture became popular after the Silver Crash of 1893.  That semi-depression caused architects to hold back on ornamental details and make homes more accessible to those that had lost much of their wealth.

Cheesman Park is home to many of the city's most well maintained Denver Squares.  The owner of this home in Cheesman Park has been working on restoring his property to it's original condition for more than a year now, and I am happy to say that work on the kitchen has officially began.  We've chosen incredibly unique colors and styles for the cabinetry and gone top of the line with a Sub Zero and Wolf package of appliances.  When finished, it will be truly incredible.

Our ambitious design calls for knocking down several walls and installing an 18' LVL (laminated veneer lumber) supporting beam where we once had a load supporting wall.  We are opening up the main traffic thoroughfares into and out of the space and really adding some functionality to a space that desperately needed it.  Our lighting plan calls for a dramatic increase in task and general lighting.

I'm also very excited because we will be reusing some of the original leaded glass panes in the new design.  The entire kitchen is driven off of these lead panes.  Heights and widths for the two main cabinets are driven off the of the size of the leaded glass panes, which in turn dictates our heights for the rest of the cabinetry.  Very cool...

I will update with more photos as work progresses...It will certainly be a dramatic transformation from start to finish.

A couple "Before" shots:

Project Featured in Des Moines "Homestyle" Magazine, September 2010

I'm proud to say that our project in Des Moines, IA was chosen to be featured in this month's Homestyle magazine, published by the Des Moines Register.  My project received 6 pages of coverage, along with 11 pictures...

Click HERE to see the online article.  It doesn't contain as many pictures as the print publication, but has the entire written article.

I'm Still Writing...But Now I am Sponsored!

I'm happy to report that I've been brought on board at Examiner.com as the Cherry Creek Home Improvement Examiner.  Examiner.com is a website dedicated to information about our specific cities, written by local insiders.  Each city has its own site, and employs "examiners" in different professional fields to write articles on everything from restaurants to gardening. 

I will be using the Examiner.com platform for more formalized content, while this site will continue to be updated with more personalized things, such as recent projects, upcoming events, and side projects. 

You can view my introductory post to the site here