chrisawadalla

Greenwood Village Kitchen

This new home in Greenwood Village belongs to one of the nicest families I've ever met.  This kitchen is a true reflection of their style.  It is warm and inviting, but feels elegant and sophisticated at the same time.  When I first met them in 2012, they had yet to break ground on this house. Here are a few of the highlights in this kitchen:

  • Originally, the sink was in the southeast corner of the kitchen.  It was in an area that I felt would become a choke point, especially for a family of 5.  I moved the sink to the East wall and added an arched window that was not previously there.

    I incorporated a traditional Rohl farmhouse sink under a new arched window for dramatic effect.

  • The North wall of the kitchen (which is the wall with all the brick) was really lacking any balance.  I moved the 48" dual fuel Thermador range onto that wall and then flanked it with symmetrical cabinetry.  All of the top boxes are individually lit with LED puck lights.

The herringbone pattern insert of bricks above the range breaks up the standard brick pattern in a way that is interesting.

  • I contrasted the white perimeter cabinetry with a black paint rub-through finish on the island.  The implied weight of the finish provides a visual anchor for the kitchen.

Interior Intuitions Brookside. 6 Hi Res

  • Lots of fantastic storage inserts...

    Knife Block

    CLICK BELOW TO SEE ALL IMAGES OF THIS PROJECT

[gallery type="rectangular" ids="889,884,891,879,882,887"]

New Kitchen and Bath Projects Fall 2013

The first snow of the year is predicted to fall this weekend.  It's only the first week of October, but after living in Colorado for almost 5 years now, it's not surprising that we will have snowy weather on Friday and sunny 70 degree weather on Sunday.  Go figure. I'm pleased to announce that I have recently been retained to work on four new projects.

A master bathroom remodel in Cherry Creek North:  We're going for a sleek transitional look.  I am specifying large format porcelain tile (18 x 36) for the flooring and a wainscot tile that is 12 x 24.  I'll tie everything together with and carrara accents, and then add some interest with vibrant colors on the walls.   The new frameless European shower will be a vast improvement.

Just up the street from the master bathroom remodel is a house owned by a couple with a young child.  It's a wonderful old house that has a newer addition on the back of it.  Problem is that the new part of the house does not tie into the old part.  There are several areas I am working on in this project including, the master suite, kitchen, great room, mudroom, entry way, and flooring.  The homeowners are very involved with the process and are excited about bringing this wonderful house together into one cohesive home.

You may have seen pictures on this blog of a classic home restoration project that I completed about a year ago...That homeowner referred me to his neighbor just down the street, and we are now currently in the design phase on her master bathroom.  Her home is very traditional, with clean lines.  I plan to give her a new bathroom that is really beautiful - but most importantly, it is going to feel like it belongs in the house.

I was also hired on to a kitchen remodel project up in Boulder.  Fortunately, this couple avoided any major flood damage - many of their neighbors are still recovering.  We're going to update their kitchen to something totally sleek and modern.  High gloss lacquer, white glass, textured laminates and quartz counters are going to make this space really POP.

We are also finishing up installation of new construction in Greenwood Village.  That project should be complete by Thanksgiving.

I will report back with pictures soon!


Transitional Bathroom Remodel - Bonnie Brae Neighborhood Denver

I always say that I strive above all else to keep the clients' vision at the heart of my design.  It's a real sticking point for me.  Honor that vision from start to finish.  The first time I met these clients, they communicated to me how much they love the look of marble.  They also wanted a space that was "transitional" in style.  The new bathroom needed to be modern, yet also feel warm and inviting.  The design of this bathroom begins and ends with a focus on the white carrara marble that was used not only pervasively in the shower, but also for the entire floor of the bathroom.  Large 12 x 24 flooring tiles lay atop a radiant heat pad that covers all areas that are accessible by foot.  Walking on this floor makes your feet happy :) Carrara marble slabs are the first thing the eye picks up upon entering the room.

The free standing tub was built for us in Georgia and the tub filler was sourced from Portugal.  Other details about this bathroom - limestone tile used on the wall behind the vanities creates a sense of drama.  The wall mounted faucets are a perfect compliment to the style of the bath, and provide for very easy counter wipe downs.  I utilized a 3" thick Quartz countertop in this space.  More carrara on the tops would have been just too much, so I found something that played off the shape and color of the tub.  The overall feel is an inviting space that is luxurious, elegant, modern, and calming.

[gallery columns="2" type="rectangular" ids="746,747,748,749,750,751,752,753"]

Dramatic Kitchen Shines in this Mountain Retreat

Every once in a while, a project comes along that is really special.  Now, that's not to take away anything from any of my other remodels or new construction projects - but sometimes you are lucky enough to be part of a project in which all of the involved parties have an unquenchable thirst to build something that pushes our creative boundaries in the quest to provide a truly unique space.  This house, this kitchen is definitely one of these spaces, and it shows through in every room of the house.  I was hired by the interior designer on this project to provide the cabinetry design for this kitchen.  We started from scratch and built something that we had never done before.  I'm quite proud of the result. You'll notice that all of the cabinetry has a reflective surface in the door.  I had to work with our cabinet shop to create a new door that would accept both a bronze glass panel and a cherry veneer panel in the door.  It wasn't easy but we figured it out and the end result is beautiful!  The Sub Zero housing is encased in a floor to ceiling column that is cladded in a natural stone.  The housing itself had to be completely re-thought from our standard because of the door swings on the refrigerator, hence the 135 degree angles on the pilasters that anchor either end of the housing.  Above the fridge, we placed a piece of Lumix Quartz (same as countertops).  The result is a piece that mimics a work of art instead of an appliance.

If you are interested in working with any of the other professionals associated with this project (interior designer, architect, builder), please get in touch with me.

[gallery type="rectangular" columns="2" ids="714,715,716,717,718,719,720,721"]

Classic White Kitchen - Observatory Park, Denver

Believe it or not, I started working with this client in the summer of 2011, and today is March 27, 2012 - which means I've waited a long time to see this project come together - I think it's going to be worth the wait. This is new construction in the Observatory Park neighborhood of Denver.  The house would feel right at home in any cozy New England town (New Canaan?) , so we took great care to make sure the kitchen and other rooms (we are installing cabinetry in 11 rooms in this home) had the feel of an updated colonial classic that would fit right into any New England colonial.  The pure white paint in the kitchen makes the space really light and airy.  The floors will eventually be stained dark, so there will be a very dramatic contrast there between floor and cabinet.  This classic kitchen will really be fantastic when complete...

Here are a few installation pics of the kitchen.  I'll update when I have some better finished pictures.

[slideshow]

Manhattan Loft: The Perfect Example of Modern Multi-Use Space

When these clients came to me, I was still working as a finish carpenter on custom kitchens in Connecticut.  They had an amazing loft in the Chelsea neighborhood of New York, but there was a corner of the apartment that really needed an upgrade. It's a laundry room, a desk, a storage area, and a lounge area - All in about 150 square feet.  You say it's impossible to squeeze all that functionality into a sleek, user-friendly space?  I guess you have to see it to believe it, and I've got the pictures to prove it.

Element 1: Laundry.  We unstacked the washer and dryer and placed them side by side.  I wrapped the units in an extra-high custom unit that has pocket doors, which can be opened and stored under the counter when not in use.   We added an 18" undermount stainless steel sink to the left and topped the entire unit with absolute black granite, honed.

Element 2: Desk.  The sturdy 2" thick desktop is solid walnut, custom built for this project.  The metal leg is also a custom piece, fabricated by a metal shop in Queens.

Element 3: Lounge.  Maybe the most complicated part of this project was figuring out how to create a built-in day bed with storage drawers underneath.  We fabricated a face frame for the front of the bed at the shop.  The rest was built on site by myself.  Solid walnut drawer fronts span the entire front of the cabinet.  The drawers provide ample storage underneath the bed.

Element 4: Storage.   Dramatic 9' tall solid walnut doors are hung using "invisible" Soss hinges.  The drywall serves as our casing, providing a very clean vertical element in the space.  Tons of storage inside.  The wall cabinet doors all hinge upward and have pneumatic gas lid stays.

Special thanks to Mark and Danny for helping me hang those wall cabinets!

[slideshow]

8 Steps to Follow for a Successful Kitchen Remodel: Steps 4-6

If you haven't yet read Steps 1-3, then click HERE.

At this point in the process, clients should have completed a few steps before moving on to the next phase of the remodel.

1.  Defined a style for the kitchen

2.  Set up a budget

3.  Assembled a team of professionals: Designer, Contractor, Architect (if needed)

4.  SET A TIME FRAME AND SCHEDULE FOR THE PROJECT

Have any of your neighbors ever remodeled a portion of their home?  If so, how many of your neighbors' projects actually followed a set schedule and finished on time?  You'd be surprised.  Most if not all construction projects will take longer than you expect, no matter how organized you are.  Hiring an experienced kitchen designer can drastically cut down on the amount of time it takes to complete a kitchen remodel.  DIY'ers will find that they fall behind schedule within a few days of starting their project.

The kitchen remodel schedule is determined based upon lead times for product.  Cabinetry has the longest lead times from time of order until delivery (unless stock cabinetry is used).  Industry standard is anywhere from 4-16 weeks for cabinets, with the upper end of the spectrum only coming into play for true custom cabinets.  Most semi custom cabinet manufacturers will require at least 6 weeks for delivery lead times.

I use the cabinet delivery date as my starting point for determining when certain deadlines must be met.  This process is most easily described using a hypothetical situation.

For our example, let's assume that the cabinets are ordered on May 15.  Assuming a 6 week lead time on cabinetry - we can estimate that the cabinets will be delivered to the premises on July 1.

So July 1 is our basepoint for our schedule.

Using this basepoint, we can lay out the basic schedule of events into a visual diagram.  To download a PDF version of this work flow, click Work Flow

5.  LET'S GET THE BALL ROLLING!

This might be the easiest step of all.  Now that you've figured out what style kitchen you want, figured out your budget, assembled a team of professionals, and set a timeline of events, it's now the moment of truth: time to write the check and hire your team.  I say this is the easiest step because you'll have absolutely no trouble scheduling meetings to hire your contractor and designer.  I have yet to meet an industry professional who won't make time to sign on a new client.

Your contracts should be detailed in scope of work and nature of agreement.  However, don't go overboard with trying to define every single detail.  A schedule of work with deadlines should be included in your contracts.  This will incentivize your contractor and designer to meet their deadlines efficiently.  Make sure that all of your costs are spelled out.

Payment terms:  Each firm is different.  A kitchen and bath dealer will operate either on 50/50 terms, or on 50/40/10 terms when they are handling installation.

50/50 = 50% up front and 50% due upon delivery of cabinetry.

50/40/10 = 50% up front, 40% upon delivery of cabinetry, 10% upon completion of project

General Contractors have all sorts of payment terms.  The main rule to remember is that you do not pay 100% of the labor up front.  Always hold a small percentage as leverage and only pay when the job is complete based upon the terms of the contract.  GC's employ a number of pricing strategies.  There is "cost plus" which means cost of materials and labor plus a defined percentage.  Some contractor work on a "contract" basis, in which the costs are laid out in the beginning.

6.  ORDER FINISHING PRODUCTS

Each project is different and unique.  Client A may want to shop around and purchase their own appliances because they have the time to commit to it.  Client B may ask their designer or contractor to supply the appliances because they are frequently out of town and don't have the time nor resources to find the appliances themselves.  Early on in the process, think Step 3 or 4, you should determine which finishing products you want to source yourself, and which ones you prefer to have a professional source for you.

Finishing products are:

Cabinetry

Tile / Flooring

Appliances

Hardware

Countertops

Paint

Fixtures

It is vital to the timeline of events that any finishing product you are planning on sourcing yourself is ordered well ahead of time and on site when construction begins.  I have seen many jobs held up for weeks (or months!) due to a sink having not been ordered with enough lead time.  Check the lead times on the products you are interested in ordering yourself.  If you plan on starting construction in a month, but the faucet you desire is on backorder for 12 weeks, then maybe you should reconsider the faucet or push the construction timeline back a bit.  I have had clients buy cheap temporary faucets in this type of situation before.

The main point here is to do the up front research on the products that will finish your kitchen.  Make sure that what you want is either in stock or able to be delivered within a timely manner.  Taking the time to go through this process in the beginning will save a lot of headaches.

Exotic finishes or materials are almost always special order.  Special order can mean anywhere from 6-12 week lead times.  Have you selected a slab of granite that has a particularly high content of iron?  If so, you're fabricator may need additional time to order special cutting blades to get through the stone.  It never hurts to ask "when can I get it?".

Up next:  CONSTRUCTION and COMPLETION

8 Steps to Follow for a Successful Kitchen Remodel: Steps 1-3

The cabinetry is hopelessly outdated, your appliances are on their last leg, and you're simply tired of not having the amenities that you want in your kitchen...

You've torn out pages from design magazines, casually browsed for new appliances, and talked endlessly about the possibilities for your new kitchen.  So when the time comes to finally put those thoughts and aspirations into motion, where do you begin?

What steps ensure that your finished remodel will actually bare some resemblance of all the visions in your mind?

It can be a daunting challenge - remodeling a room in your home.  The kitchen, no doubt, is the most used, and most viewed space in your home.  Whereas a small design mistake in another room in your house, perhaps the study, may go unnoticed by yourself and others, a mistake in the kitchen will rear its ugly face every day.  It can't be stressed enough that proper planning in the pre-construction phase of the project is the most important aspect of any remodel.  This is amplified ten fold for a kitchen remodel.

Where to begin??!

As a kitchen and bath designer, I have had the opportunity to work on some amazing remodels.  There are some basic rules, or steps, that I follow during every project and I have found that sticking to these steps is a very effective way to ensure that all of my projects are conceived fully, run smoothly, and achieve an end-result that is pleasing to my clients.

As a general rule of thumb, if you follow these basic guidelines, it will greatly increase your chance of completing a successful remodel.

1.  WHAT'S YOUR STYLE?

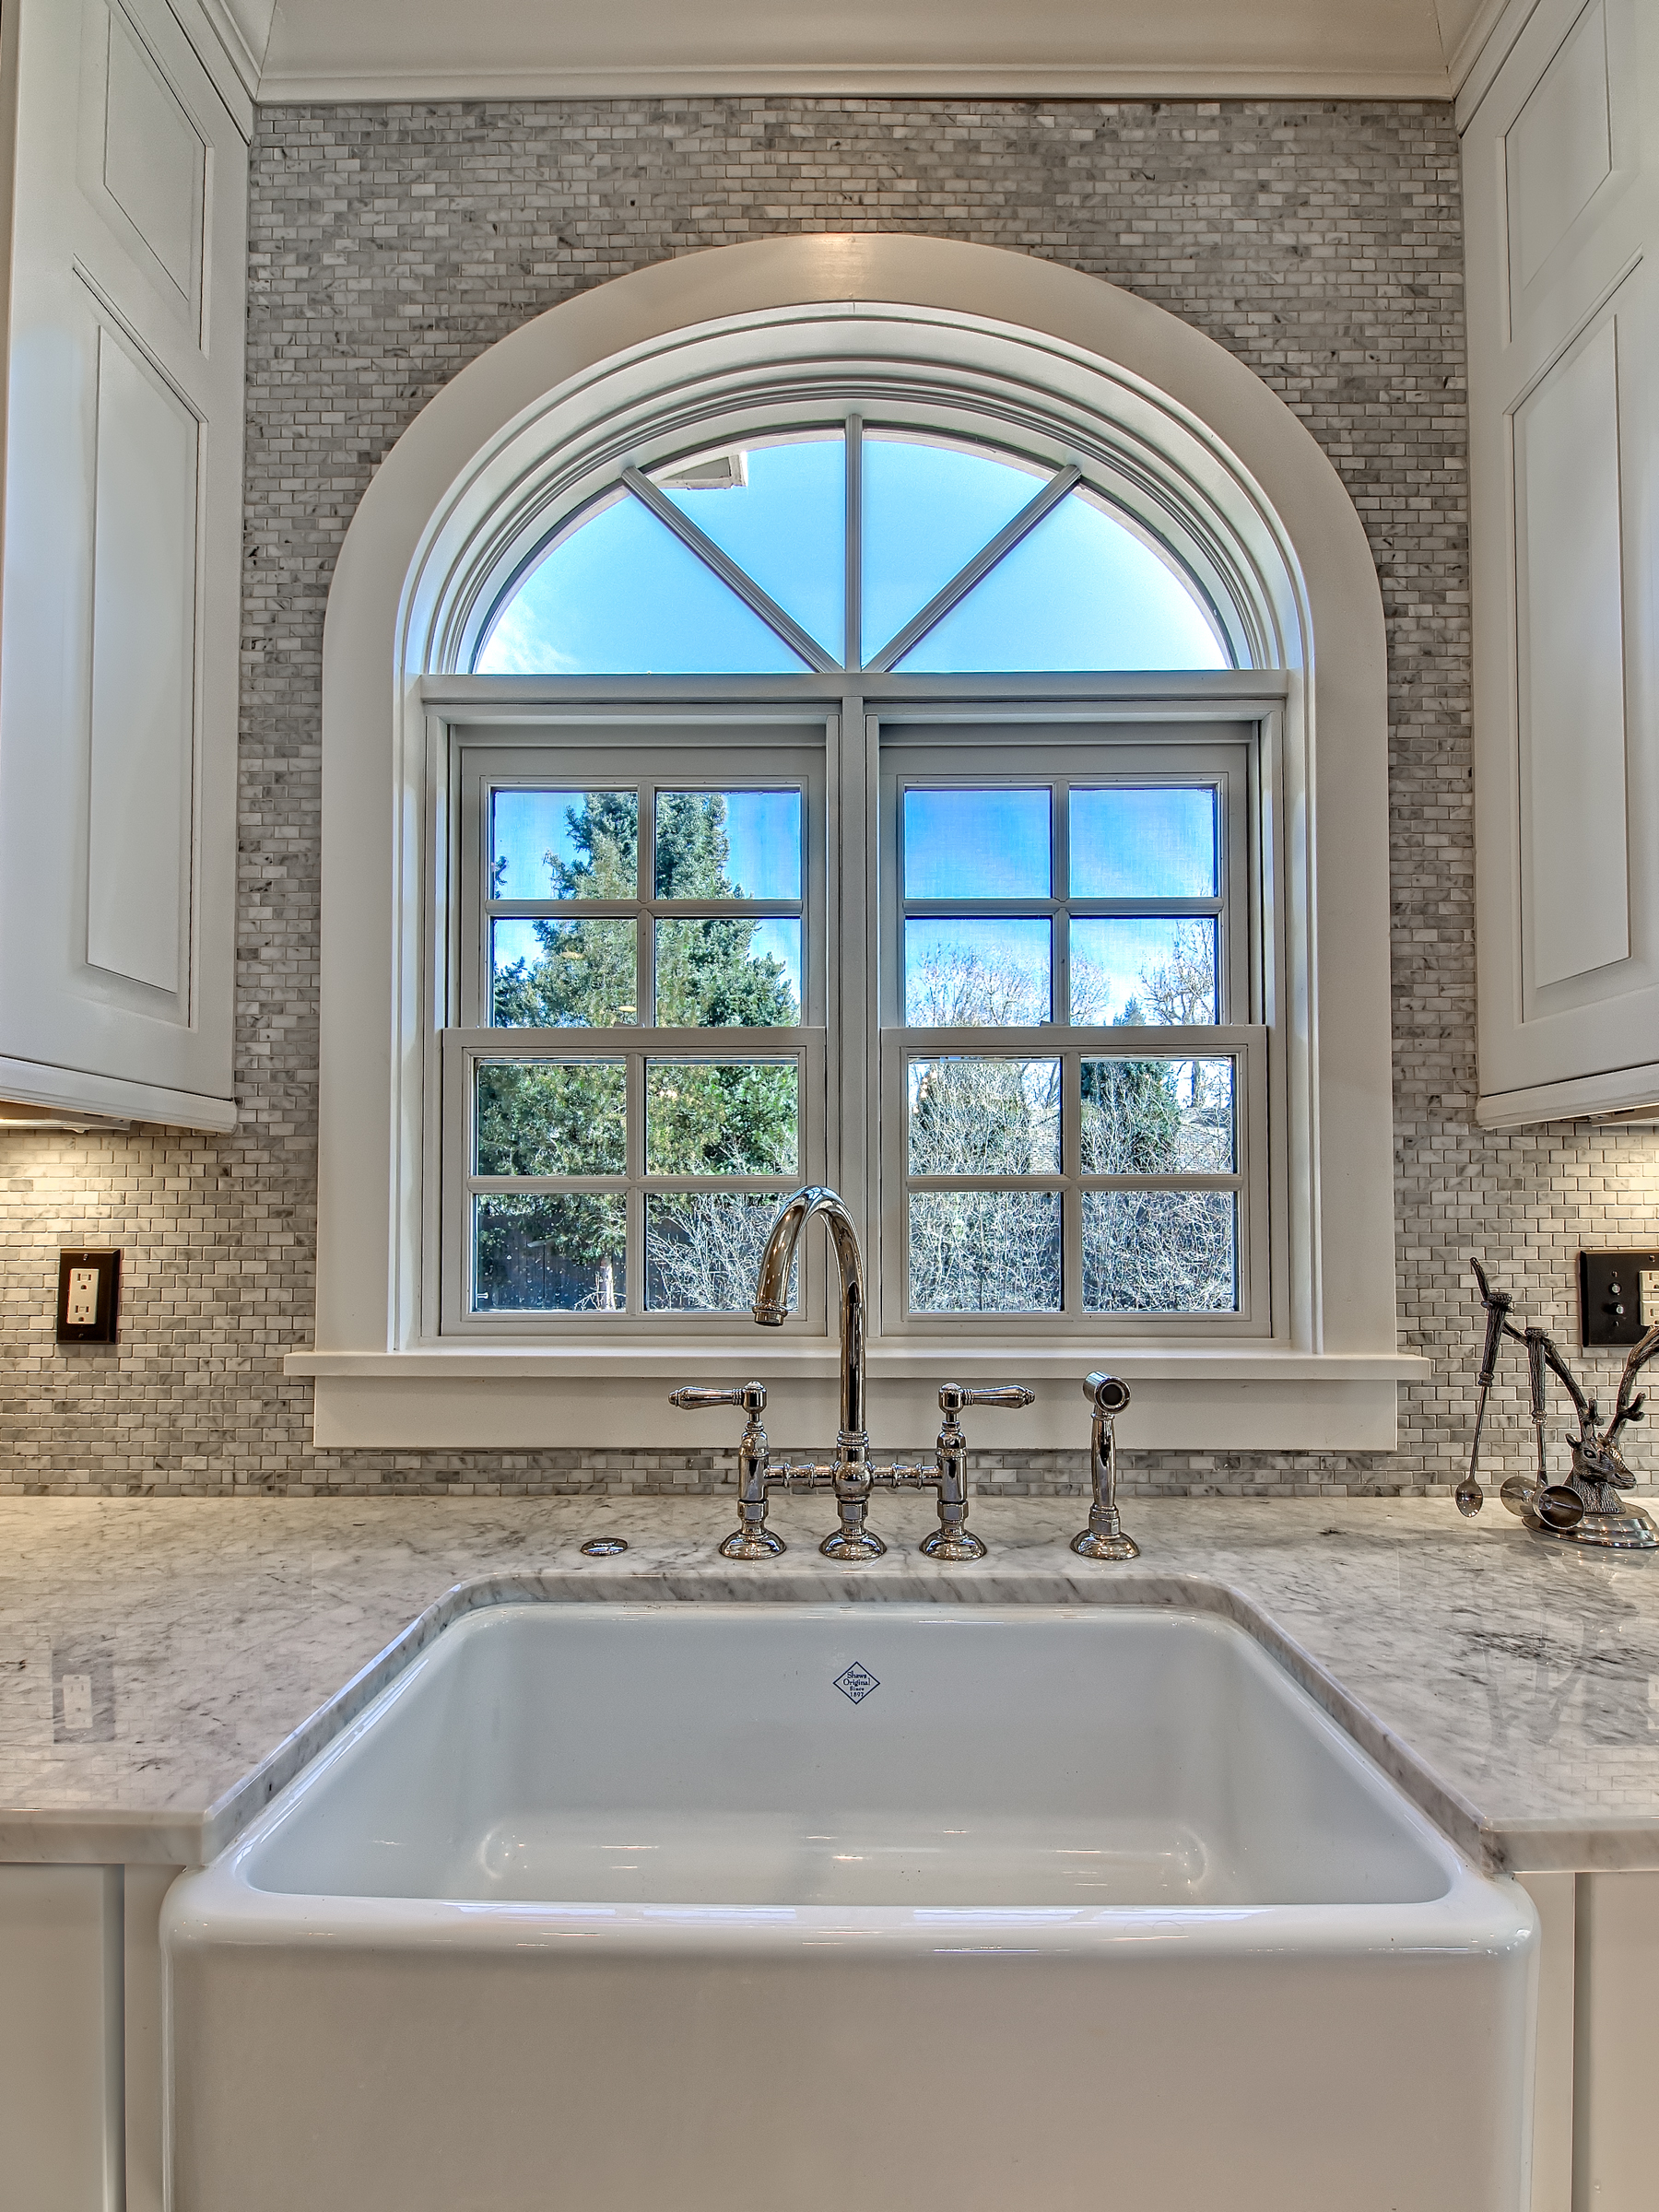
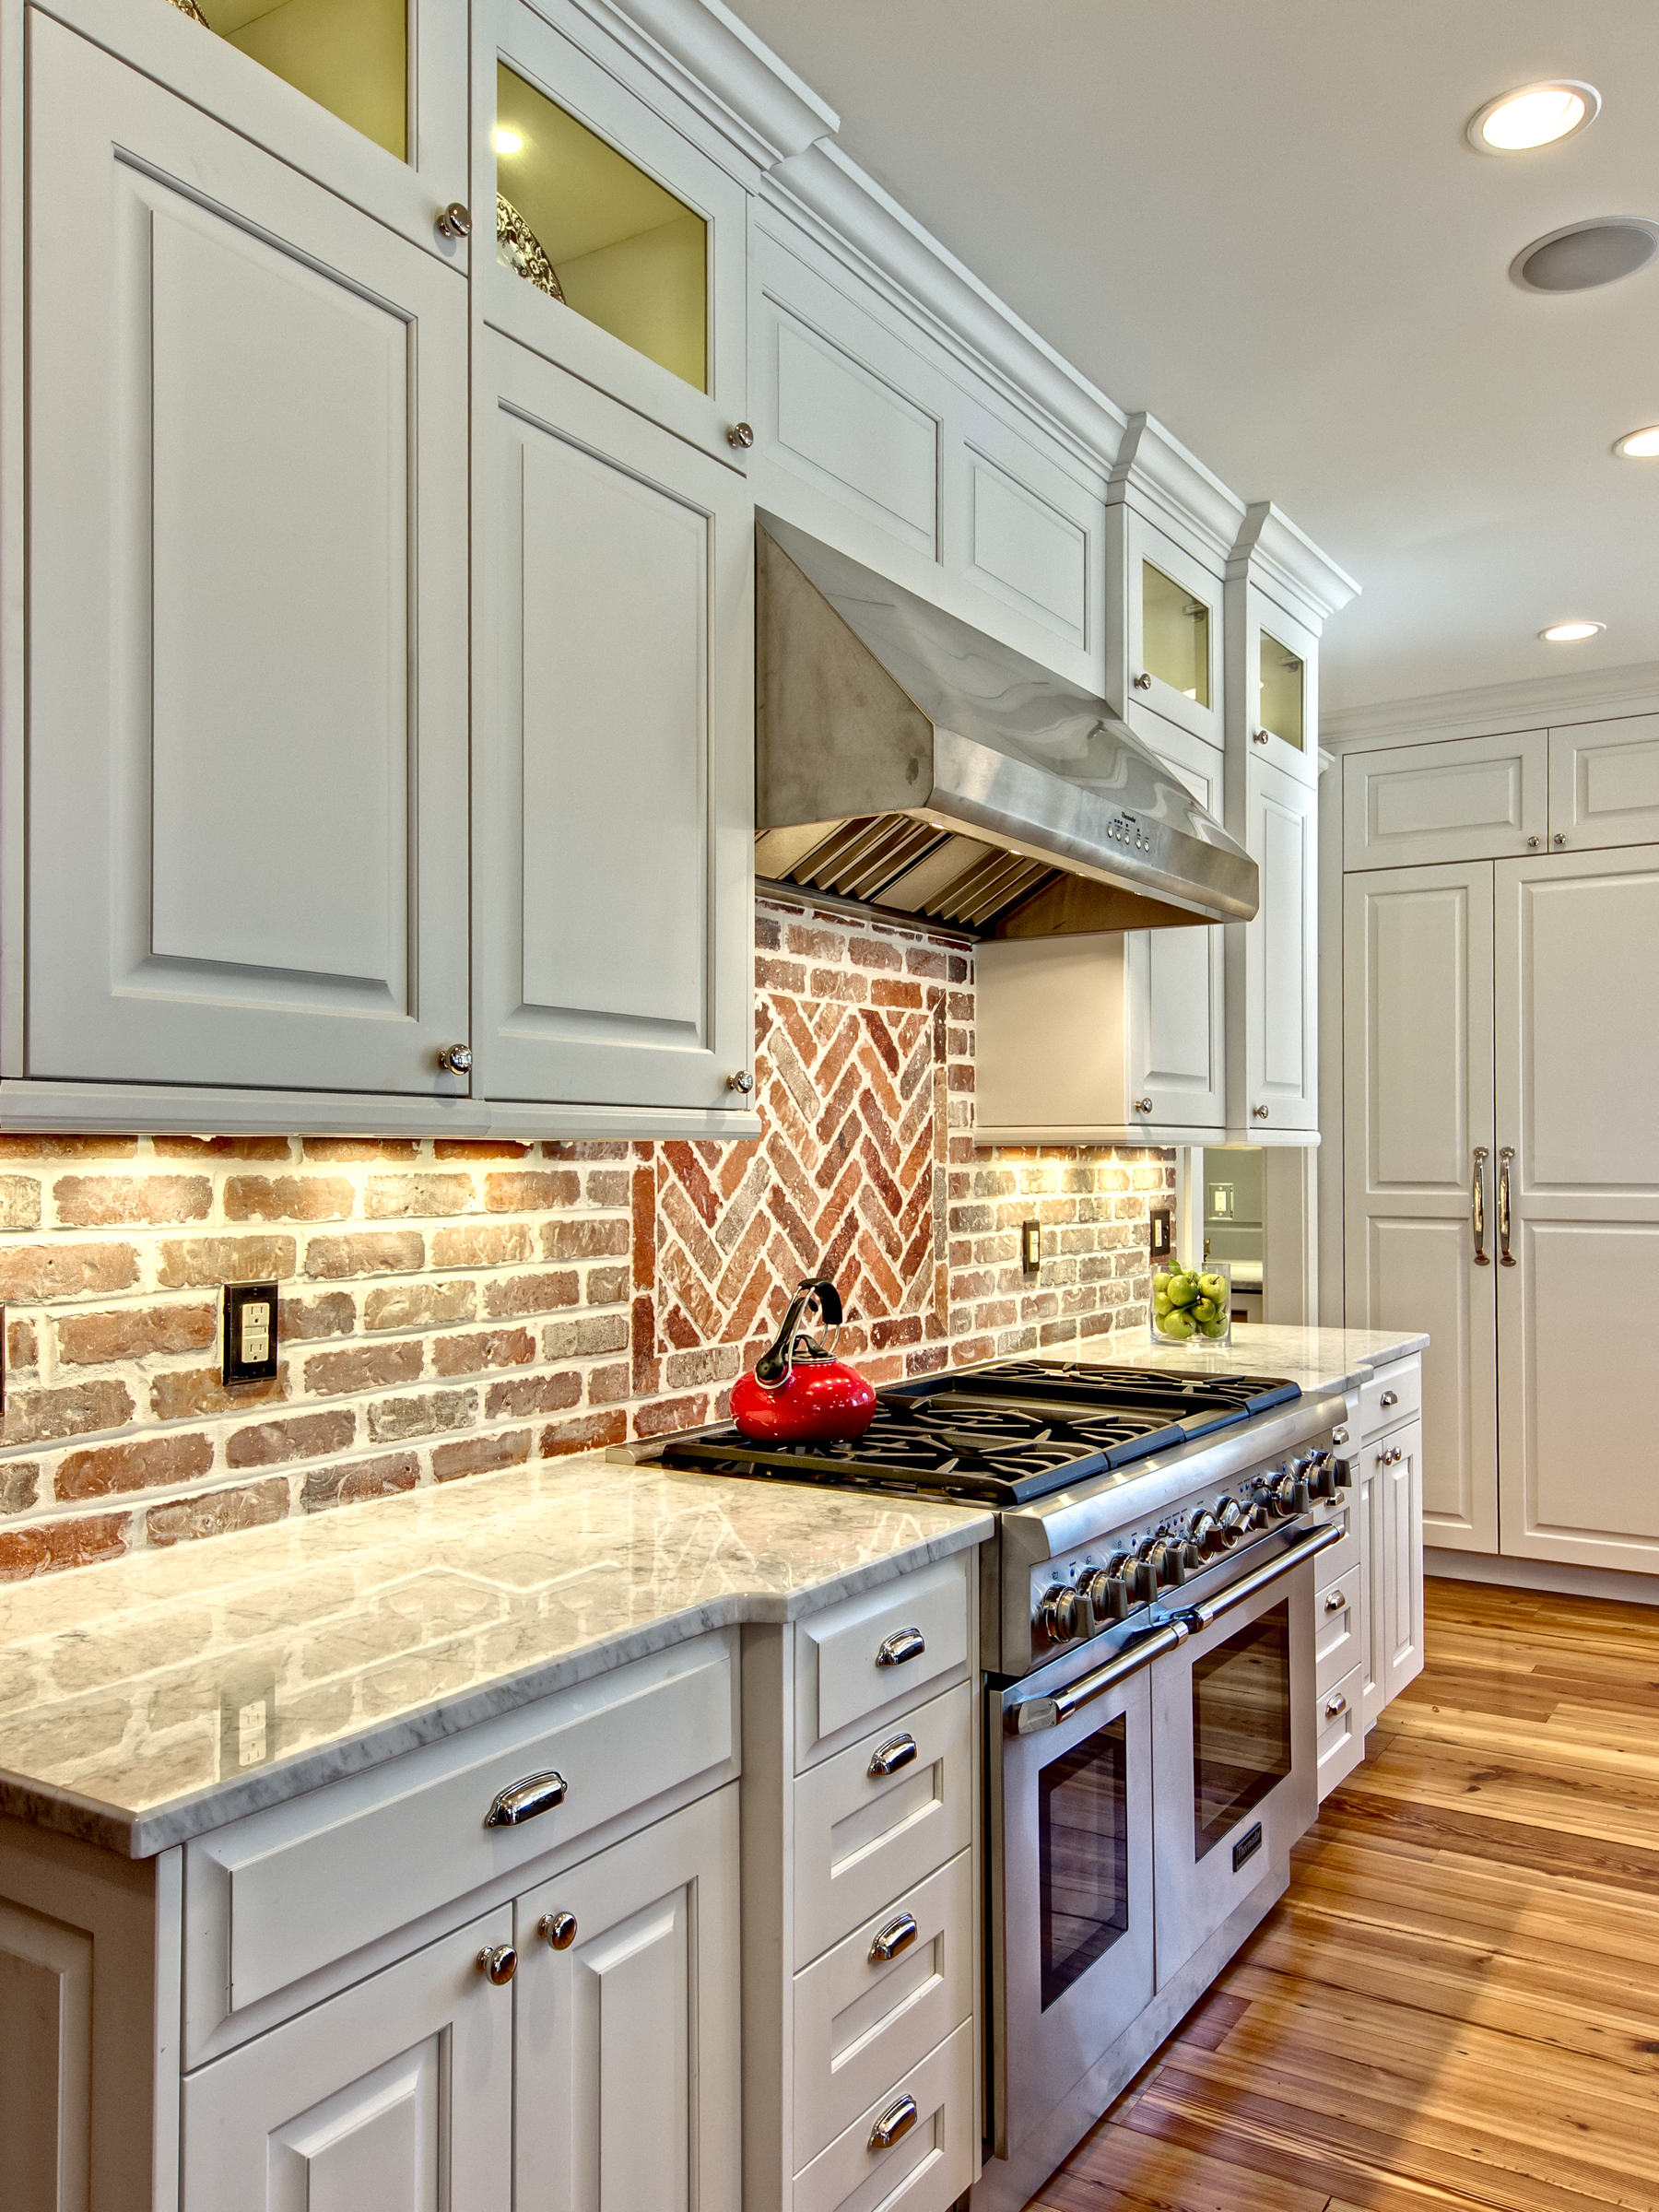
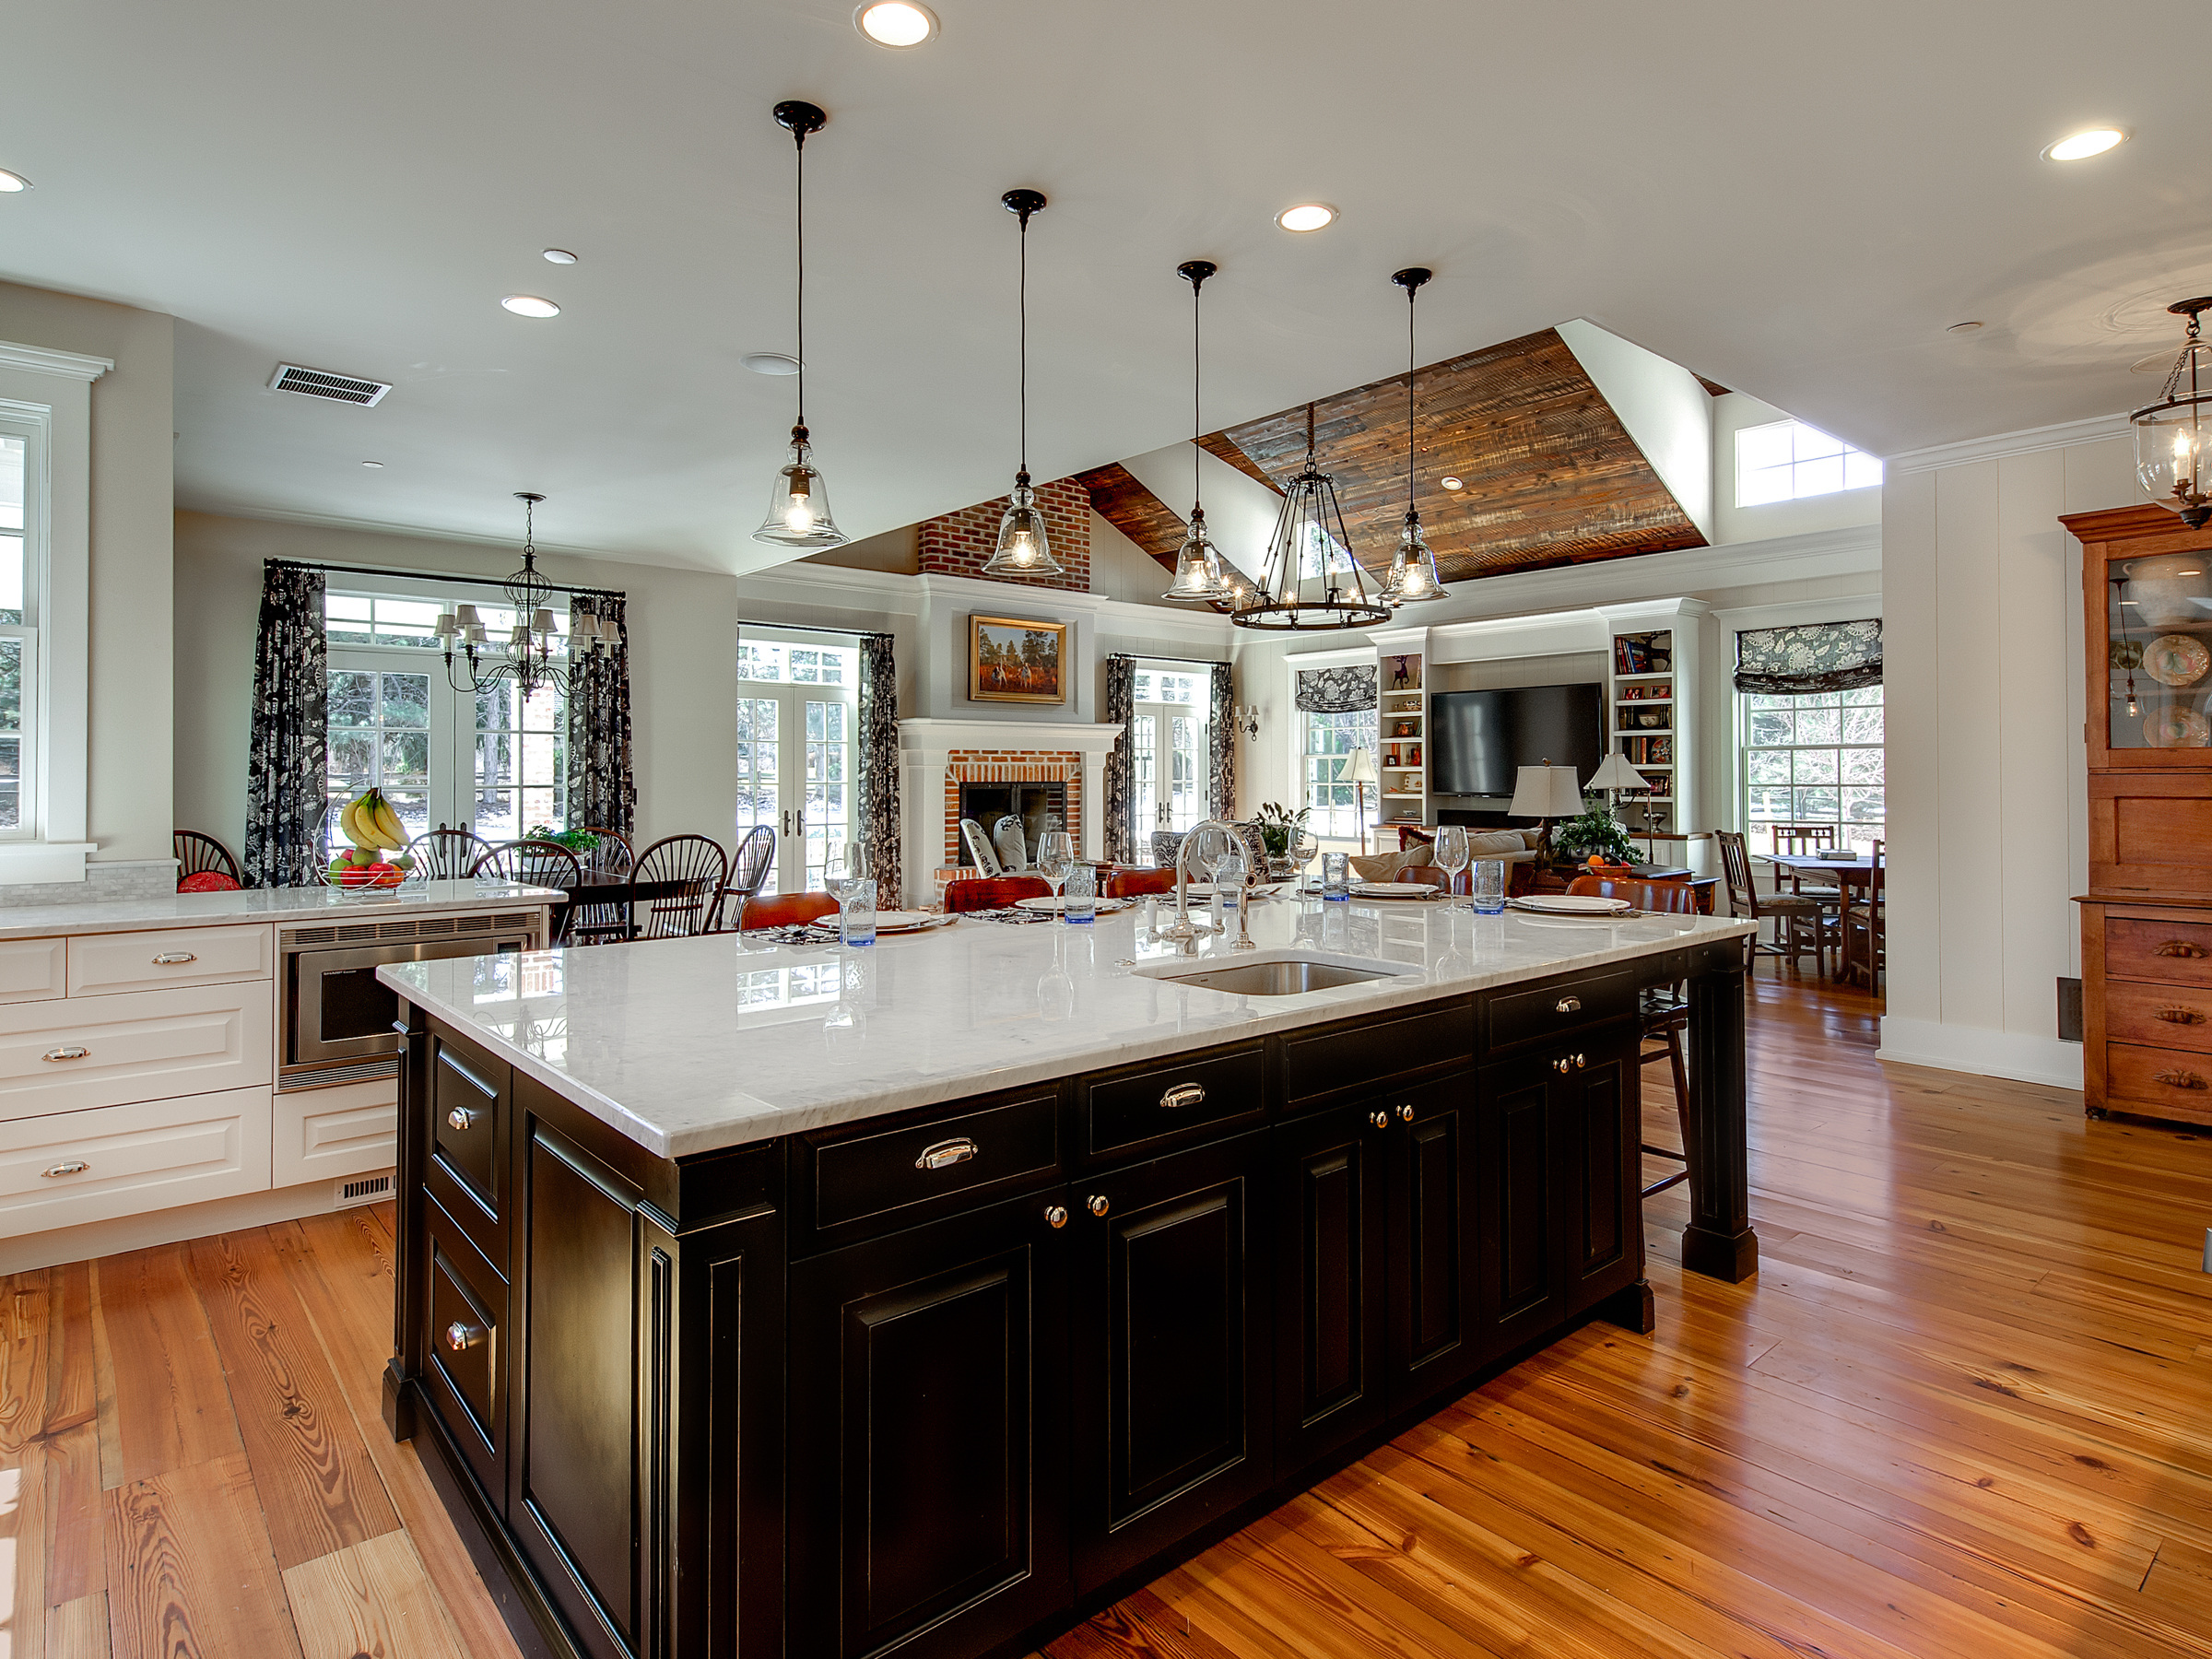
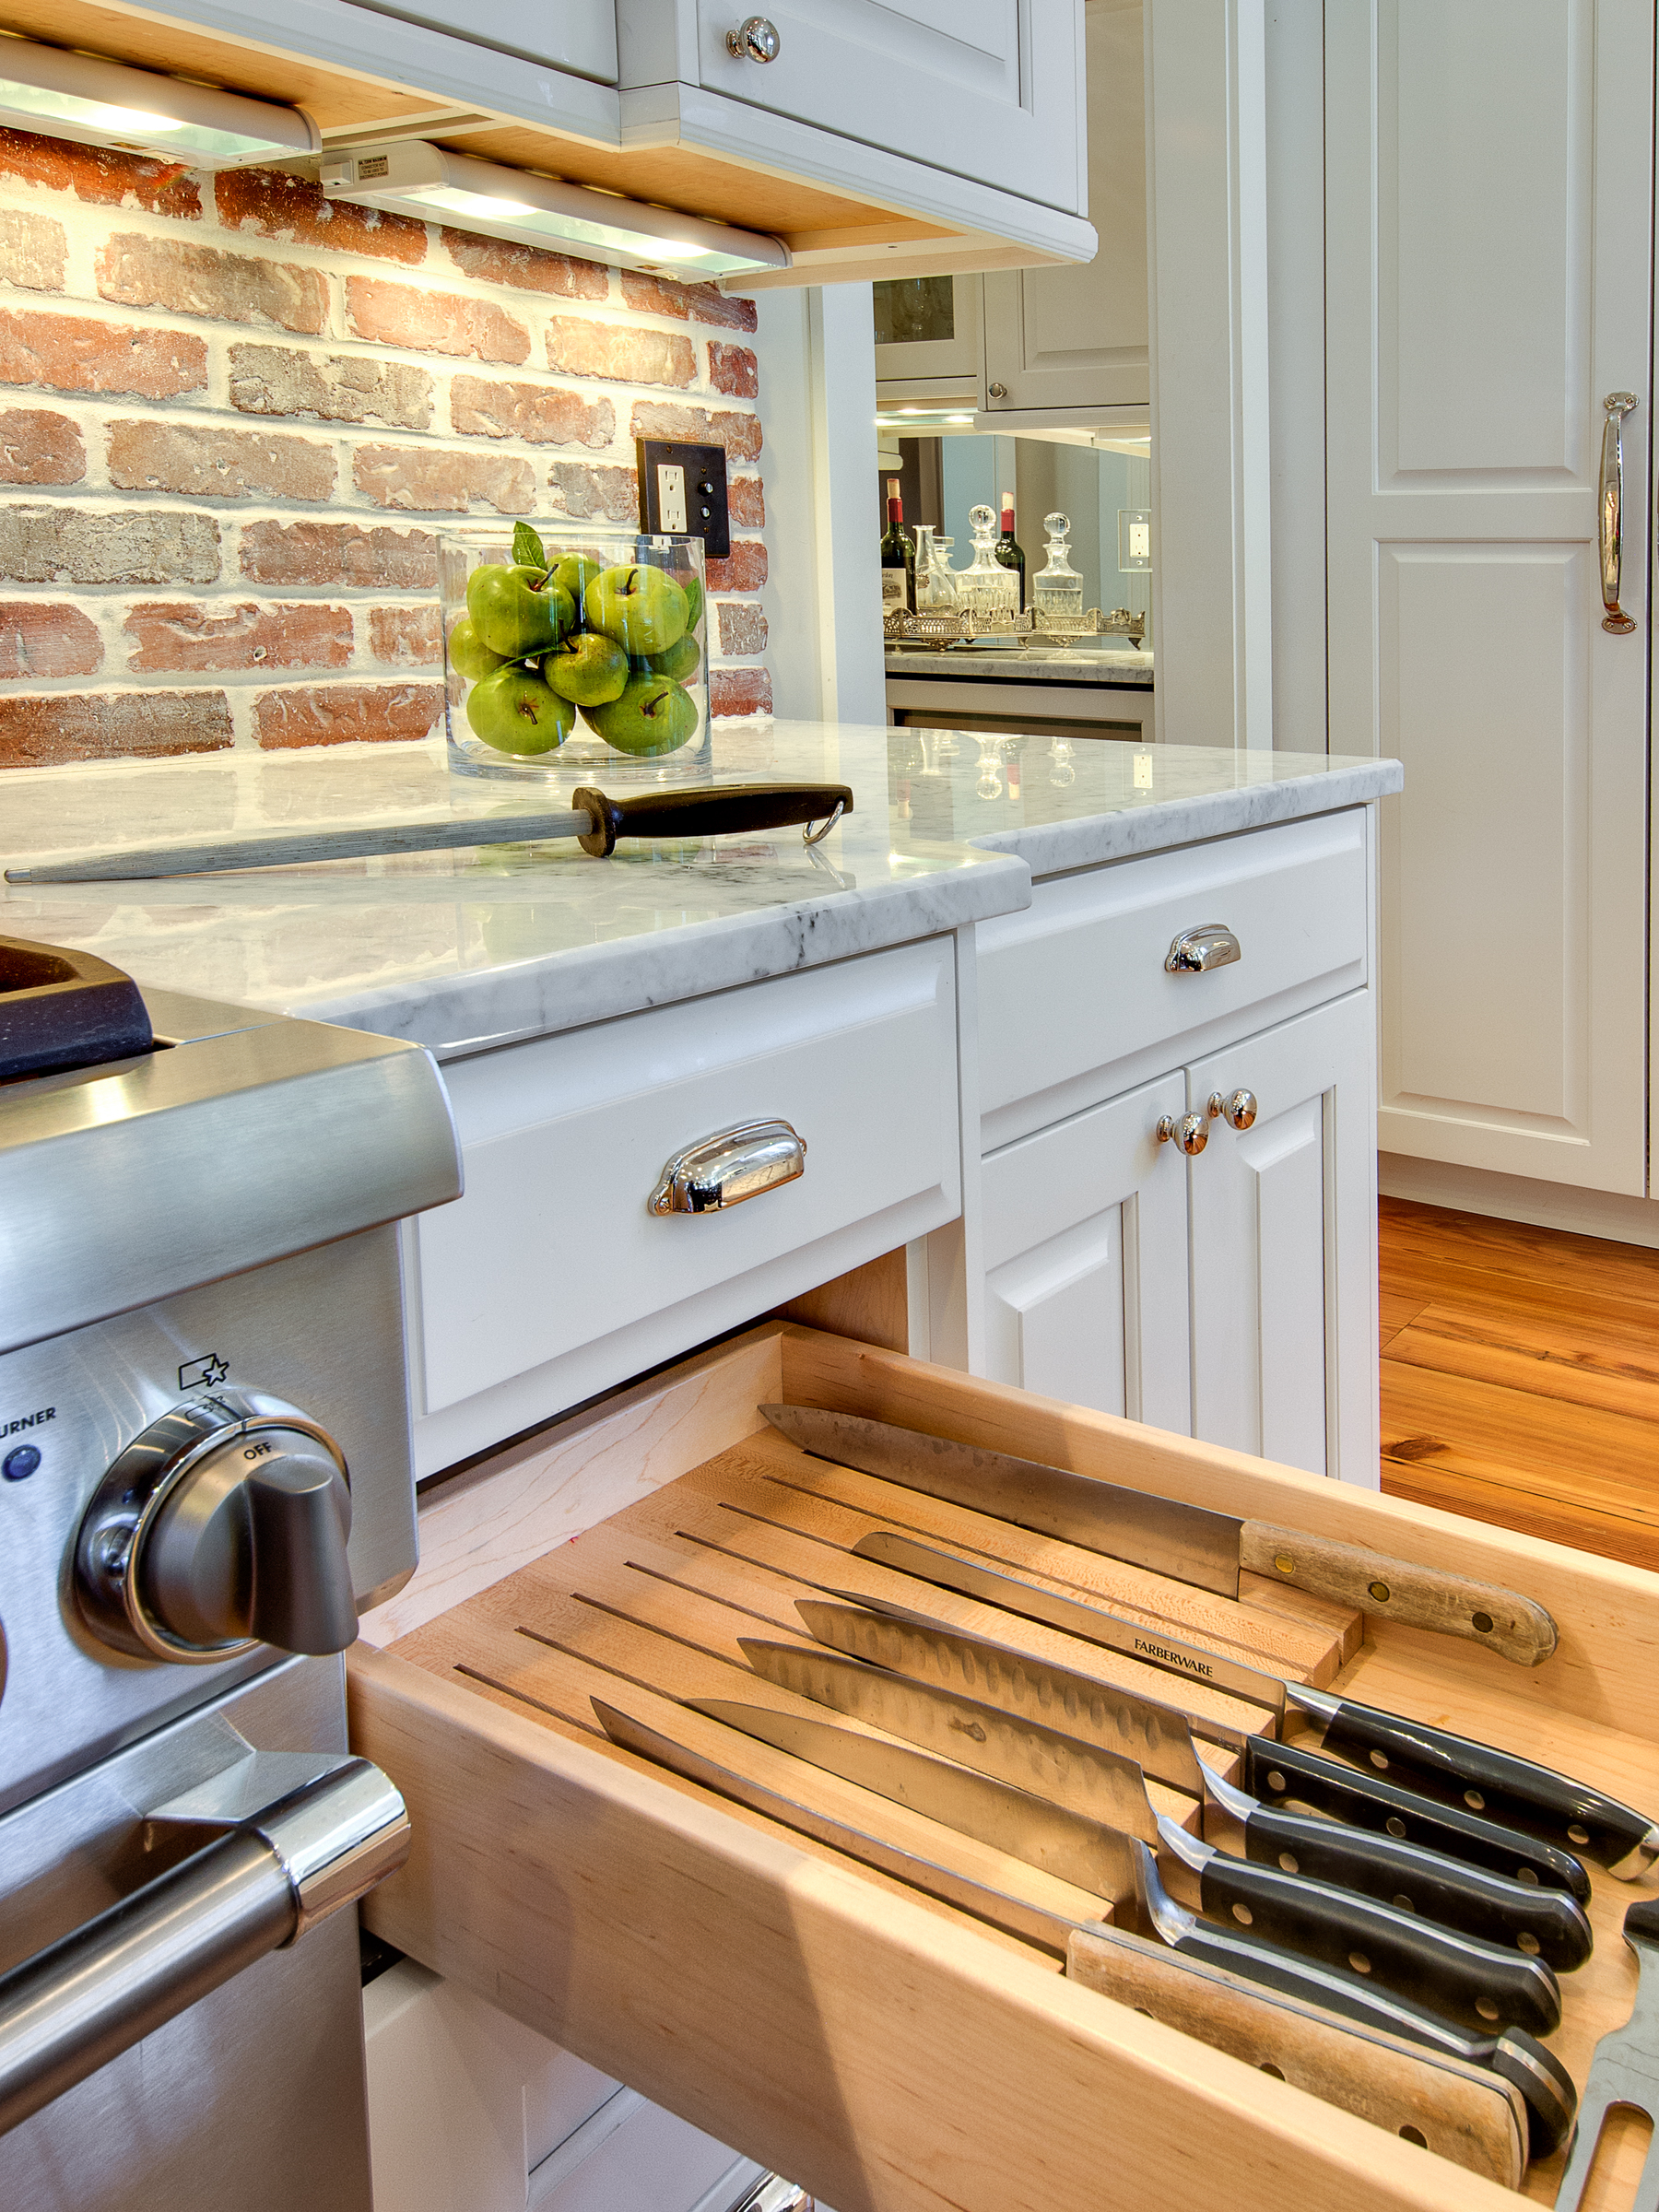
Whether it is contemporary, traditional, french provincial, arts and crafts, or any number of other styles, you'll need to identify what sort of "feel" you want for your kitchen.  You may not know what your style is until you see it.  Flip through magazines, browse websites, take note of your neighbors' kitchens.  Pull out pages from magazines, print pictures from websites, and assemble a folder with all of these items.  It may be a certain color that you saw on in an advertisement for cabinetry, or a door handle that you saw in your neighbor's kitchen.  Whatever it may be, take note of it.  These design choices will come together and identify the style you're interested in.

If you already have a clear vision of what style you want to achieve with your new space, then you're already ahead of the game.

Textures, colors, and materials all play a role in the style of the kitchen.  For instance, if you're looking for a "mountain" feel for your space, consider rustic woods such as knotty alder.  Consider a painted white finish or cherry / maple specie for a traditional kitchen.

2.  WHAT IS YOUR BUDGET?

Usually, one of the first questions that you should talk honestly about is your budget for the project.  Consider that an average sized kitchen can be remodeled from $25,000 to $250,000 depending on the materials, scope of labor, design fees, and appliances.

The overall cost of a kitchen remodel is usually somewhere between 12% - 20% of a home's value.  Using a hypothetical situation, we will use a $500,000 home value and 15% variable for the overall budget = $75,000 overall budget.

Using the hypothetical situation above, we can break down the remodel into the major components, and the amount of the budget that is typically used for each area.

40% Cabinets:  $30,000

15% Appliances: $11,250

8% Countertops: $6,000

7% Floors: $5,250

5% Lighting / Electrical: $3,750

3% Tile: $2,250

2% Sink/Faucet: $1,500*

20% Labor: $15,000

*assumes one sink/faucet

Figuring your budget and being realistic will make the entire process run more smoothly from start to finish.  You will have the ability to be up front with your contractor, your designer, and your self in the early stages of the project.  Knowing budgets helps the contractor in choosing his materials, and it will guide your designer in his/her drawings so that the space comes in at or beneath your budget.

Obviously, choosing higher end products in one category will mean you will have to choose lesser priced materials in another.  This is usually the case.

3.  ASSEMBLE YOUR TEAM

I can't stress this enough.  No other factor in the entire process will make or break your project faster than assembling the right people for the job.  Spend the time up front to find experienced, reliable, and proven professionals to come on board for your project.  But this still leaves the question, what kinds of professionals do you really need?

1.  Kitchen Designer

2.  General Contractor / Builder

3.  Architect*

*Architects are usually only employed when major structural changes are called for.

DESIGNERS: Hiring a designer is the first step here.  Your designer will be your "agent" throughout the entire process.  They quarterback the entire project from start to finish.  They will help you finely tune your vision and will be able to provide cabinetry, countertops, appliances, tile, and flooring.  Employing a designer is vital to a project's success.  A great place to start your search for a Kitchen and Bath Designer in Denver is the National Kitchen and Bath (NKBA) website. CLICK HERE

GENERAL CONTRACTORS / BUILDERS: Most likely, your designer will have a list of preferred contractors or builders that they work with on a consistent basis.  However, it is up to YOU  to choose your contractor.  RULE:  Always interview at least three general contractors before choosing one.  You may have a family member who recently did some work on their house and was 100% satisfied with their contractor.  Get a referral.  The best way to actually gauge a reference is to speak to someone who is currently having work done on their home.  Ask them how things are going.  Is the project on schedule?  Is it within your original budget?  Do the workers show up on time and behave appropriately while on the job?  The more information you have the better, so don't be afraid to ask questions.  General Contractors are responsible for pulling building permits, all plumbing and electrical, painting, and flooring.  Each project is different, so you may only employ them for certain pieces of your remodel, while sourcing the other pieces elsewhere.

ARCHITECTS: Unless you are planning major structural changes to your home, i.e. an addition or full house gut, you probably will not need an architect.  However, if your plans call for major structural work in any part of the home, it can be a good idea to employ an architect.  Here is a list of Denver's AIA certified architects:  CLICK HERE

NEXT - STEPS 4-6

Kitchen Remodel - Des Moines, IA

Project A takes place in Johnston, IA. My mother in law is a big entertainer.  She loves to throw parties and have people over.  Her home is constantly abuzz with visitors and family members.  The old kitchen was not a good fit for her.  It was closed off and outdated.

The appliances were 15-25 years old.  Linoleum floors.  Formica countertops.  The lighting was insufficient.  The footprint of cabinetry and the dividing wall between the kitchen and great room made the space feel twice as small as it actually is.

Basically we removed the wall that divided the kitchen from the great room, added more functional interior cabinet fittings, and updated the materials and appliances.

Cabinetry: Maple and Lyptus, slab doors

Cooktop:  Miele 36" 5-Burner Induction

Oven / Micro: GE Advantium 30" Combination Micro / Oven

Fridge: Sub Zero 42" stainless steel with dispenser

Dishwasher: Miele LaPerla

Venting: Miele 42" telescopic hood (raises and lowers up to 12" by touch button)

Flooring: 12x24 tile

Countertops:  Granite, "Iron Red"

Slideshow of Entire Project:

[slideshow]