I attended an event at Galleria of Stone last night and was amazed with some of the natural stone that was on display. Galleria of Stone has on display one of the most innovative granite products that I've seen in a while. In a nutshell, fabricators overseas have the ability to etch a myriad of designs onto the face of any slab of granite. There are approximately 72 different designs that they have come out with to this point in town. Roughly 24 of these are on display. The slabs come into the United States with the designs already etched onto the faces. Stone is then fabricated here using the standard practices. Here are some close up pictures of some of the different designs available. Remember these are available in full size slabs! [gallery type="square" columns="2" ids="726,727,728,729,730"]
Educational
Butcher Block Island Countertop
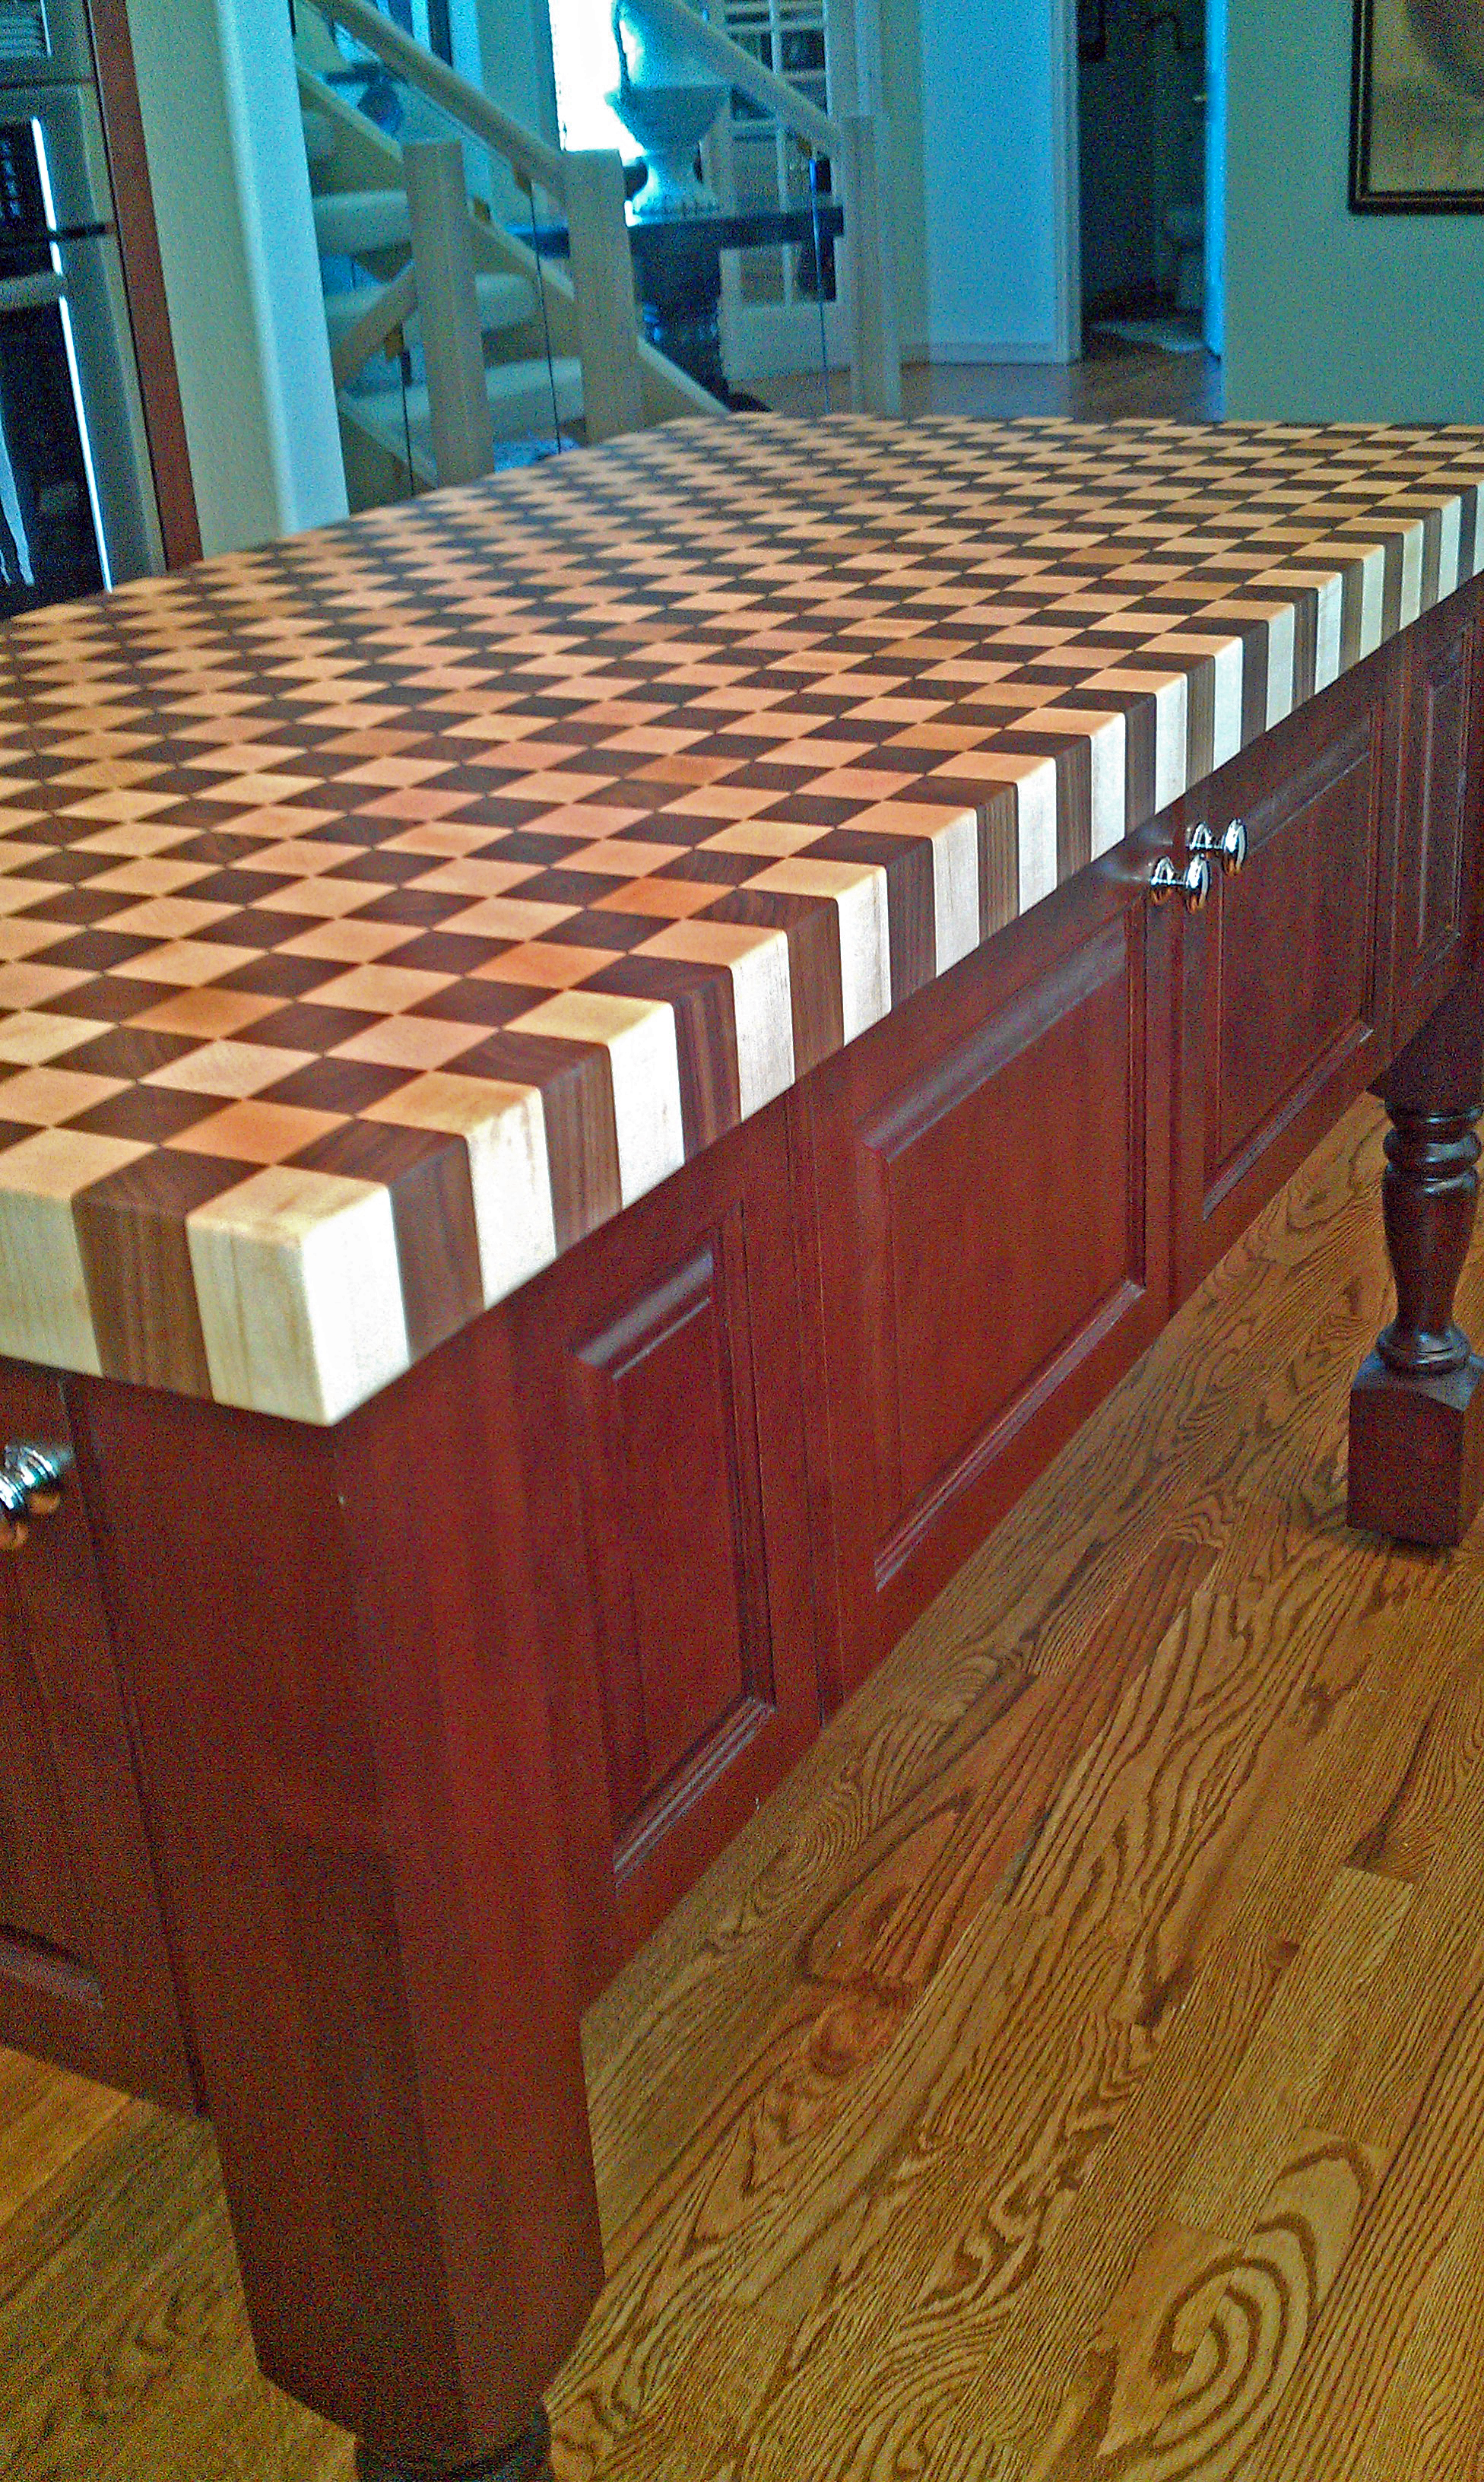
Here's a quick preview of a finished project in Centennial. We took a "builder special" kitchen that was previously all white and completely non-functional, and transformed the space into a rich and welcome space that easily slides between casual and formal. The 2-1/2" thick custom butcher block top is definitely the focal point of the kitchen. The top was produced by Grothouse Lumber in Pennsylvania and arrived just yesterday. This couple loves to cook and was focused on increasing the usable prep counter space in the kitchen. We took the cook top out of the island and moved it to the peninsula in the new layout, leaving the island top as 100% prep space. What's even cooler is that this island is on low profile casters. It can be rolled to any location on the main floor. When this couple entertains large groups, they will be able to roll the island off to the side and use it as a seperate buffet area - or it could serve as a mobile bar. It's versatile and looks absolutely gorgeous with the new butcher block.
If you are thinking about incorporating wood tops into your kitchen or bath remodel, here are a couple pointers for choosing the right fit for your new space.
1. Don't choose a wood top for a high use island unless you are aware that it will get little dings, scratches, and dents over time. Wood tops are not stone. They will dent. Fortunately, these tops tend to look better the more beat up they get.
2. Make sure to oil your wood top generously the first six months. It will require food grade mineral oil. Here is the use and care guide from Grothouse.
3. Wood tops can make great accent pieces in any space; whether kitchen, bar, or bathroom. In a bathroom - think about using a wood top at a make-up area for a little bit of a softer feel. Bars are natural spaces to include wood tops - I mean - when was the last time you went to the pub and it was anything BUT wood? Grothouse has a patent on a special finish called "Durata" that is completely impermeable to water and comes with a lifetime guarantee against water infiltration or spotting.
4. You can build almost any shape or thickness out of wood, so there are very few design limitations with wooden tops.
Kitchen Lighting Ideas
Kitchens and baths really need great lighting in order to be a success. Don't make the mistake of leaving this detail out of your plans until it's too late. So before you finalize everything in the planning stage, make sure that you have taken these three things into account: 1) Where and what type of GENERAL lighting do you want in the kitchen, i.e. - recessed cans, pendants, etc...
2) What type of TASK lighting do you need to perform your daily tasks such as meal preparation, coffee making, and cleaning?
3) What type of ACCENT lighting do you want, if any at all? This can include interior cabinet lights, cove lighting, etc...
4) What kind of bulbs do you want to use? Do you want halogen, xenon, LED, or flourescent undercabinet lights? What kind of bulb do you want to use for your recessed can lights and fixtures?
GENERAL LIGHTING
The first thing to do is to gauge how much natural light from windows and skylights is available. For instance, during the planning phase of my own kitchen remodel in the summer of 2011, we decided that there was just not enough natural light in the kitchen. Our kitchen is situated in the northeast corner of the house (read: least amount of sunlight) and the two windows to the kitchen were shaded by the roof over our covered deck. The first thing we did was add two skylights to the roof to increase the amount of natural light. It was a bit costly up front, but as a result, we never have to turn our lights on during the day. Over the life of our stay in this home, we think the energy savings from not running lights during the day will effectively pay for the two skylights.
If your kitchen is really dark, considering adding a skylight, or even a window.
After gauging your natural light, determine how much general lighting you want. It's best to have 4" or 5" recessed can lights spaced about 48" apart from one another over the countertops, and a few well placed recessed can lights in the center of the kitchen. 4" cans cost a little more than the standard contractor-grade 6" versions. However, the smaller version definitely is a more pleasing aesthetic look. Don't forget to plan where and how you want to switch them on and off. If you have multiple entrances to the kitchen, you definitely want these lights to be switched at the main entry points using a three way switch. It's also a great idea to install a dimmer switch at one location so you have the option of lowering the light output. There are no rules except one: always try to center a can light (or hanging pendant) over the main sink.
Check out the difference a bigger window and removal of covered porch made in this kitchen.
TASK LIGHTING
This refers to the lighting that you use to perform daily tasks. Cleaning, making meals, chopping broccoli, bathing your child in the sink...etc. No matter how great your general lighting is, you'll definitely need some task lighting. The most important is under-cabinet lighting.
I recently came across this light, which I think is great. It throws off a ton of light and it's an LED, so it's really energy efficient and it will never emit any heat. Traditionally, LED lights have been much more expensive than Xenon or Halogen. However, just as with all technology, as the number of manufacturers has increased, production costs have come down. This one is quite affordable and I have it specified for a large kitchen in Vail, which will install in June.
Place your undercabinet lights at the front of the cabinets, not at the back. This will produce the best result and better distribute light on the counter surface. Most undercabinet lights come in several different lengths, so you should be able to find one for most every cabinet width.
One important caveat to LED lighting: It's what you call "low voltage". The 15amp circuit that feeds the undercabinet lights is not wired directly into the light. Instead, a "driver" or "transformer" is needed to reduce the voltage prior to feeding the light. It can be complicated, so it's best to just specify the type of light you want, and then hand it off to the electrician to figure out the rest of it. There are several restrictions on length of cable used and number of lights allowed per driver. A good lighting store should be able to sort you out. Just don't expect to get answers to these questions from Home Depot or Lowe's (I really prefer Lowe's - much better don't you think?)
[polldaddy poll=6071277]
ACCENT LIGHTING
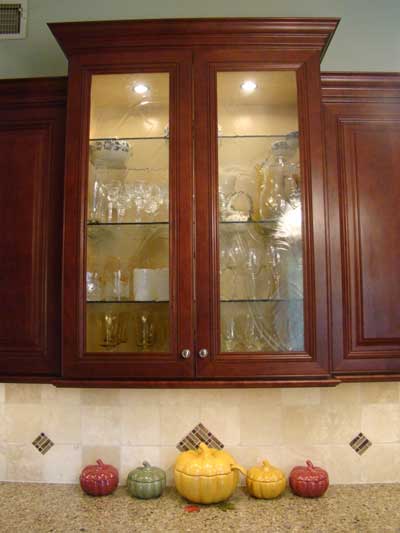 Accent lighting is what usually sets the great kitchens apart from the ones that are just "good". It's a well placed fixture or an interior light behind a glass door that can really make a space pop. For these types of applications, you're really not going for a light that is super bright...You're looking for something that just accents a desired space, such as the interior of a cabinet, or the space between crown moulding and a ceiling.
Think about whether or not your cabinetry will join to the ceiling, or if it will stop short of the ceiling. If your crown moulding stops short of the ceiling, it might be a nice idea to add some rope light on top of the cabinets for a cool ambient feel.
On the "way out there" spectrum, translucent stone is now also being back lit for really dramatic effects. Check out this picture of a quartz countertop which has been backlit from beneath: 
How to Build Wainscot Paneling
Wainscot paneling is something I used to do a lot of when I lived in the Northeast. It's found in many older traditional homes, and is often replicated in remodels and new construction to achieve a warmer feel for a space and add interest to otherwise plain walls. Wainscot comes in many different heights, styles, and variations. It can be created with a variety of materials, but wood is mostly used for the construction.
Originally, wainscotting was used in 16th century English homes to combat rising dampness. England has a very humid and damp climate, and this was one method that early builders used to fight mold and mildew that would rise up out of the ground and infiltrate the lower portions of walls in homes.
Now, it is used mainly by designers and builders to adorn the walls of upscale homes. It is traditionally painted or stained and, like I said, can come in many different variations.
Steps to Create Wainscot
1. Rip your horizontal rails to the desired width. If you are planning on a 3" exposed rail and you have a 4" baseboard, then your rails should be ripped at 7", as the rail will be applied first and the baseboard attached to it, flush to the floor. Use 3/4" thick MDF (medium density fiberboard) or paint grade plywood if you are planning on painting your wainscot. If you desire a stained wainscot, then take care to select only the best boards for your material, as the stain will accentuate any grain patterns or defects that are found in the wood.
2. Mark stud locations on wall.
3. Draw level lines at the desired heights and then nail your wainscot to the wall at the locations where you previously marked off studs.
4. Next, mark off your desired locations for vertical stiles. Nail these into place as well, and be sure to apply ample wood glue to the ends that will abut the horizontal stiles and rails.
5. After you have nailed your stiles and rails to the wall, you'll have a pretty good idea of what the end product will look like. Miter your chosen panel mold or inside profile into the panels, per your design.
6. Add your chair rail and cap mold. Here's where you can get creative. There is no set way to build wainscot. Take your time designing and drawing before you start any nailing or building. Draw the panels out on the wall to ensure that you like the size and shape of them.
7. Finally, all of the nail holes and joints will need to be filled with putty and sanded to a smooth finish.
8. Your wainscot will need to be primed first, and then painted with a minimum of two coats of paint. I recommend spraying the paint, as brush application will take a very long time, and the sprayed finish gives a very uniform even coat.
My Favorites from KBIS 2011
"This year's show is SO much smaller than past years' shows." KBIS 2011, in my opinion must have been the smallest show in many years for the NKBA (National Kitchen and Bath Association). I think I must have overheard this quote about ten times during my three days in Vegas. Despite this perceived lack of attendance, it still felt like a pretty big show to me, and I met a lot of people who will definitely make a difference in my business the upcoming year. Best of all, I got the opportunity to see the best and brightest new products that are on the market.
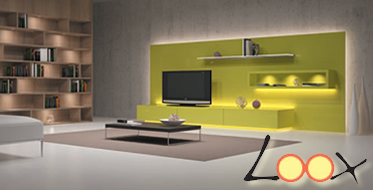
Lighting in the kitchen and bath is a real focal point now. Toto even has a line of sinks with integrated LED lights underneath that shine up and through a transluscent material. Hafele probably has the LED product with the most "cool factor". It is called LOOX and it's versatile, energy efficient, and simple to install. LED is still rather expensive, but it is very energy efficient and you'll probably never have to change a bulb for as long as you own your house. Check out my earlier blog post about the Basics of LED Lighting.
I was also impressed with Northern Contours. Based in Minnesota, Northern Contours builds doors for major cabinet manufacturers. They have great capability and are true custom in this respect. To give you an idea of their capabilities, I took a picture of a high gloss real wood custom veneer cabinet vignette that was on display. What does this mean for you? Take a look at their website, www.northerncontours.com, and if you find a finish that you love, it can be made for your very own project.
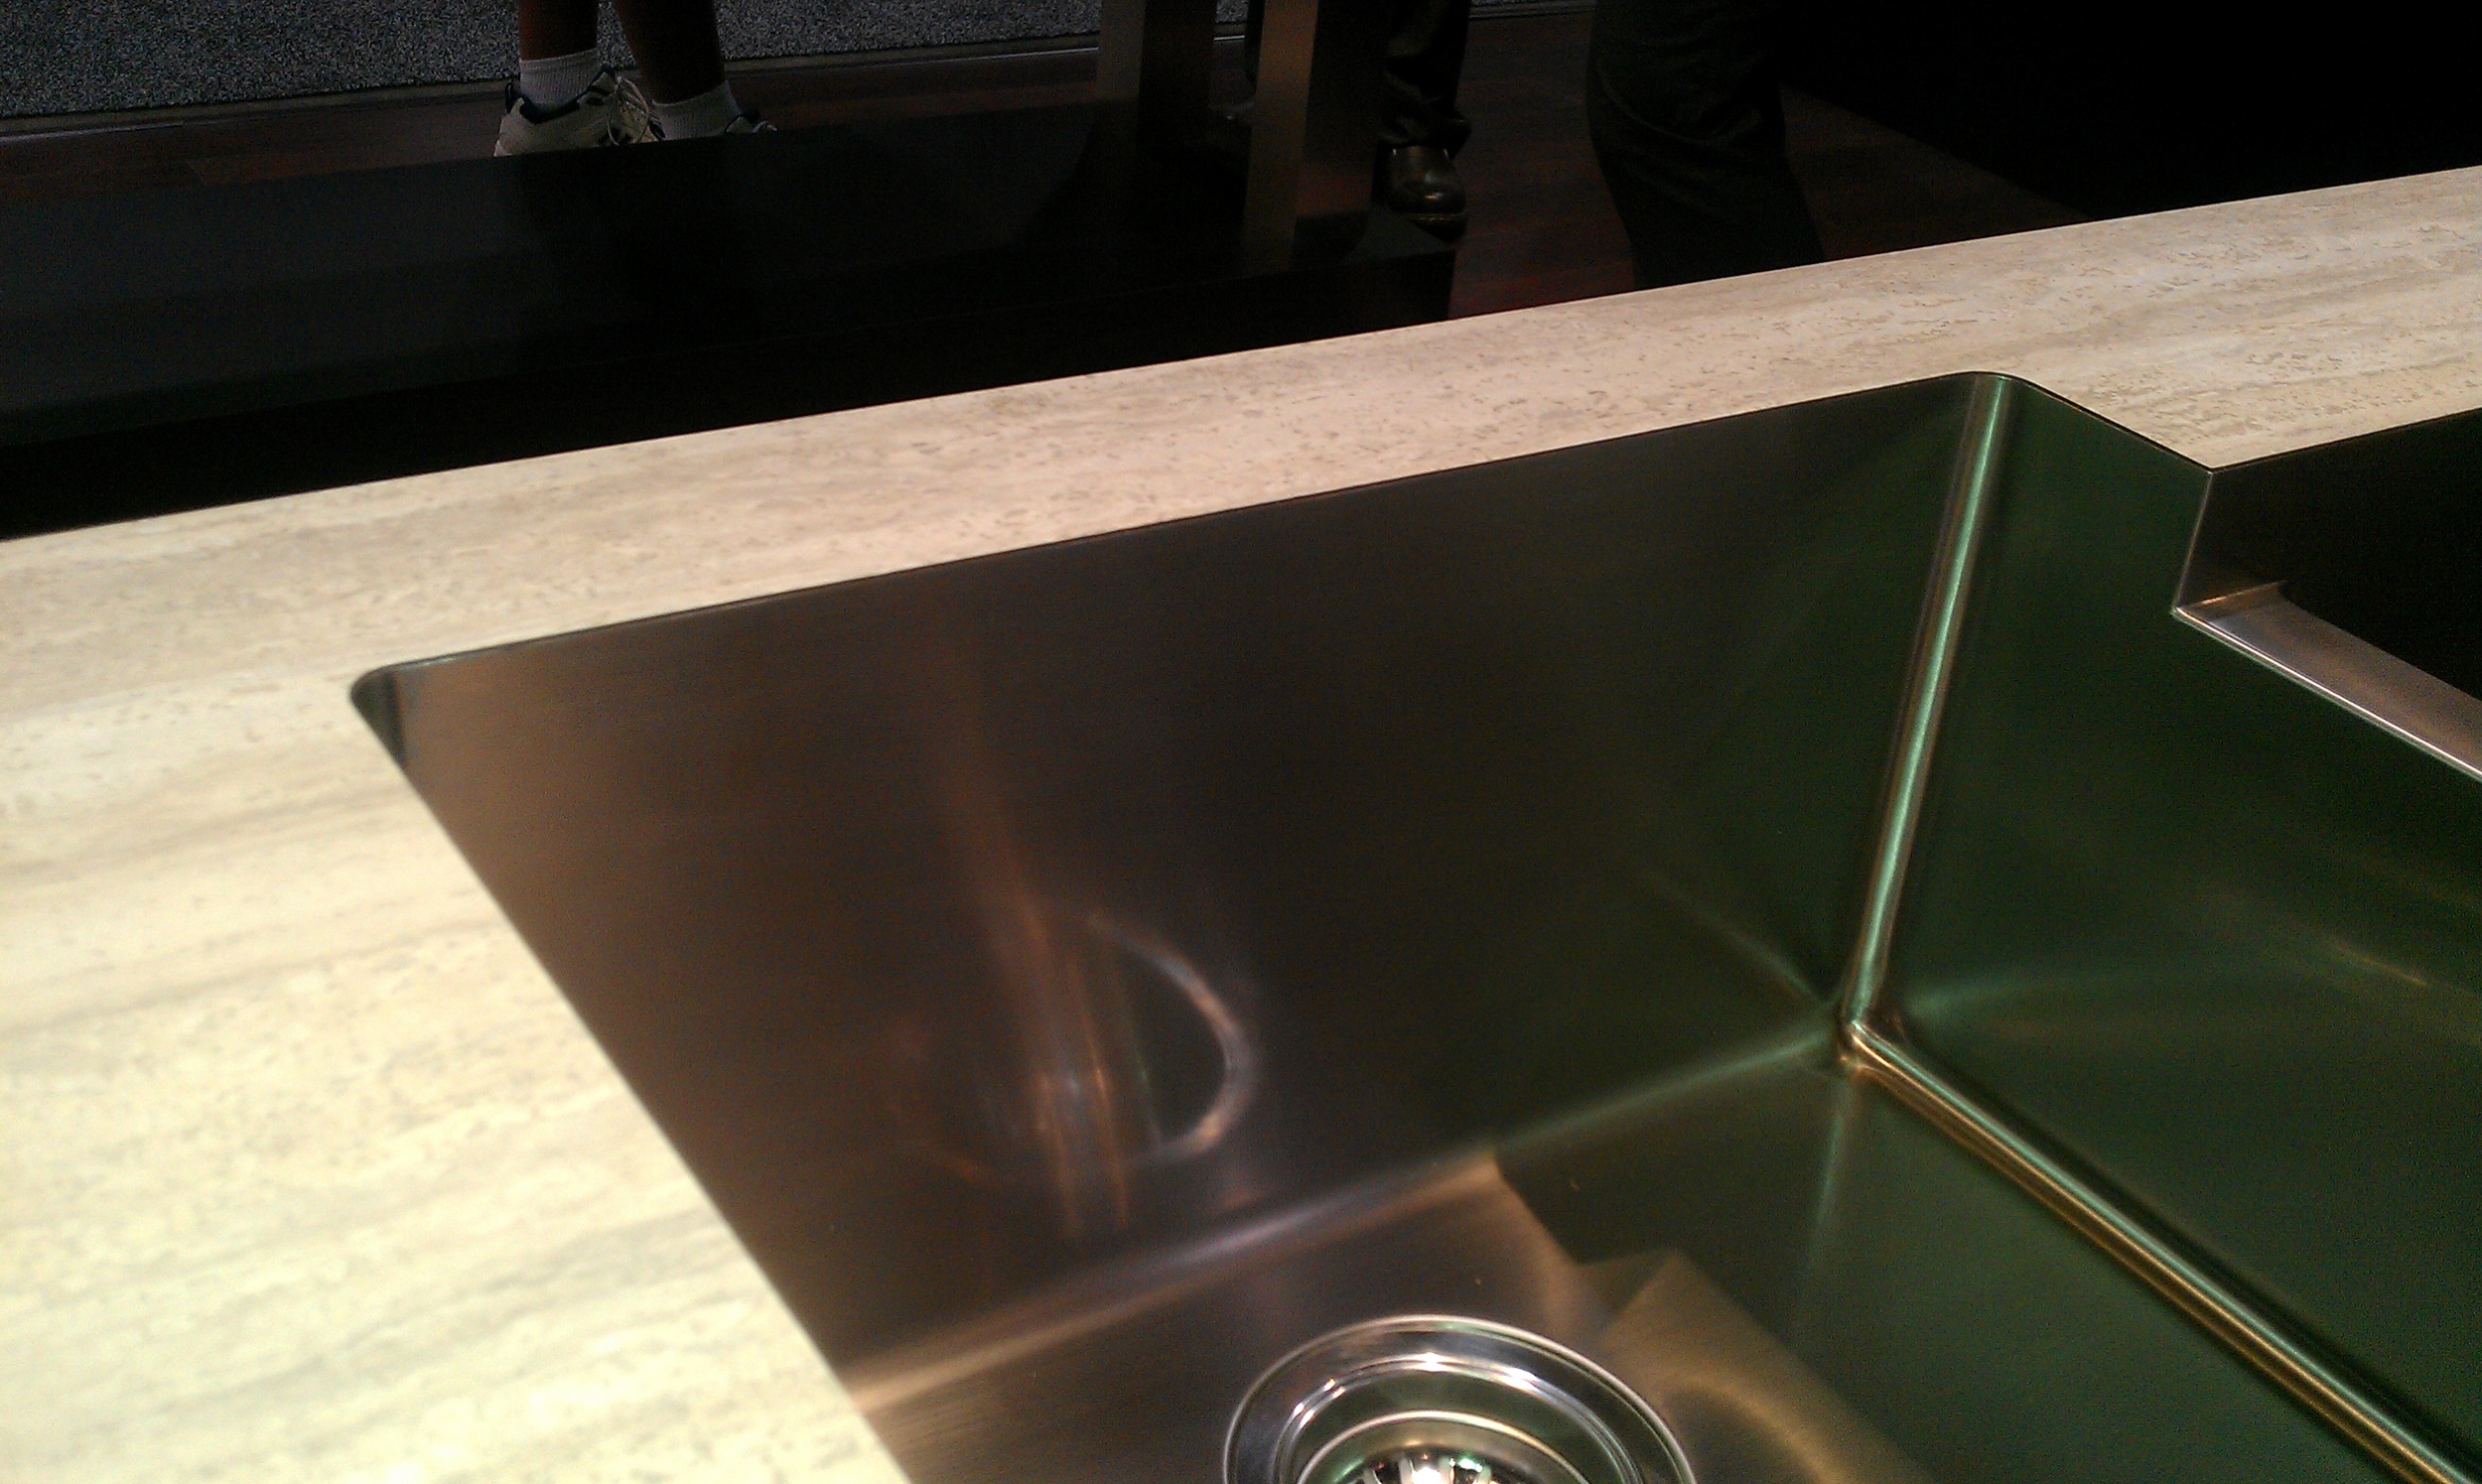
Karran makes sinks with zero lip on them for solid surface or laminate countertops. Laundry rooms would really benefit from this feature. Using a patented design, Karran has created a sink that can be undermounted to laminate or solid surface, virtually eliminating any and all seams or overhangs. It's a great look. TIP: So you can't afford granite? Specify a Karran sink for your laminate countertop and really upgrade the overall look of the space. It immediately gives a high end look.
Ok, now for an item that might not be practical for everyday use, but if you're looking to really make a statement with a powder bath and just want the WOW factor, I might suggest the following product...Toto has a line of vessel lavatories called "Luminist". Luminist incorporates LED lighting beneath a translucent lavatory bowl. When turned on, the vessel appears to emanate light evenly in all directions. The Toto website has better pictures of this product, but here's one I snapped with my camera phone.
If you are planning on creating a steam shower or a shower with multiple rain heads and heavy volume of water flow, it is worthwhile to explore the Schluter Kerdi Board System for the encapsulation of all moisture and vapor. Schluter is well known for their tile accessory products and this is just one more addition to their various products. Schluter has incorporated the drain into the pre formed pan board of the shower, virtually eliminating the risk of water leakage at that point. They also have some very pleasing designs for the drains. One of which is pictured below.
To view this year's "Best of KBIS" as voted on by the NKBA, check out the following link:
http://www.kbis.com/show/best-of-kbis
Til next time...have fun with those projects!
Some Notes from KBIS 2011 in Las Vegas
 First off, I apologize for the formatting. This is my first post via a mobile device. We'll see how it turns out.
I am also convinced that Electric Mirror is going to be a hot item in the coming year. These mirrors provide lighting and mirror in one, which is really nice because the best lighting at the vanity is at eye level, not from above. I recently specified the "Novo" mirror for a Denver bathroom remodel and can't wait to see the finished product installed in about a month.

Rambling Thoughts...
Totally surprised by the lack of contemporary cabinet lines on display. Taiwanese /Chinese vendors and manufacturers have evolved from last year, but it will be a while before they measure up to the big market players such as Kohler in terms of quality and marketing technique. Speaking of Kohler, they really impressed me with some of their new lines. Abrezo Line of fixtures was awesome...very refined. Anyone interested in a $6,400 toilet withal touchscreen control unit?
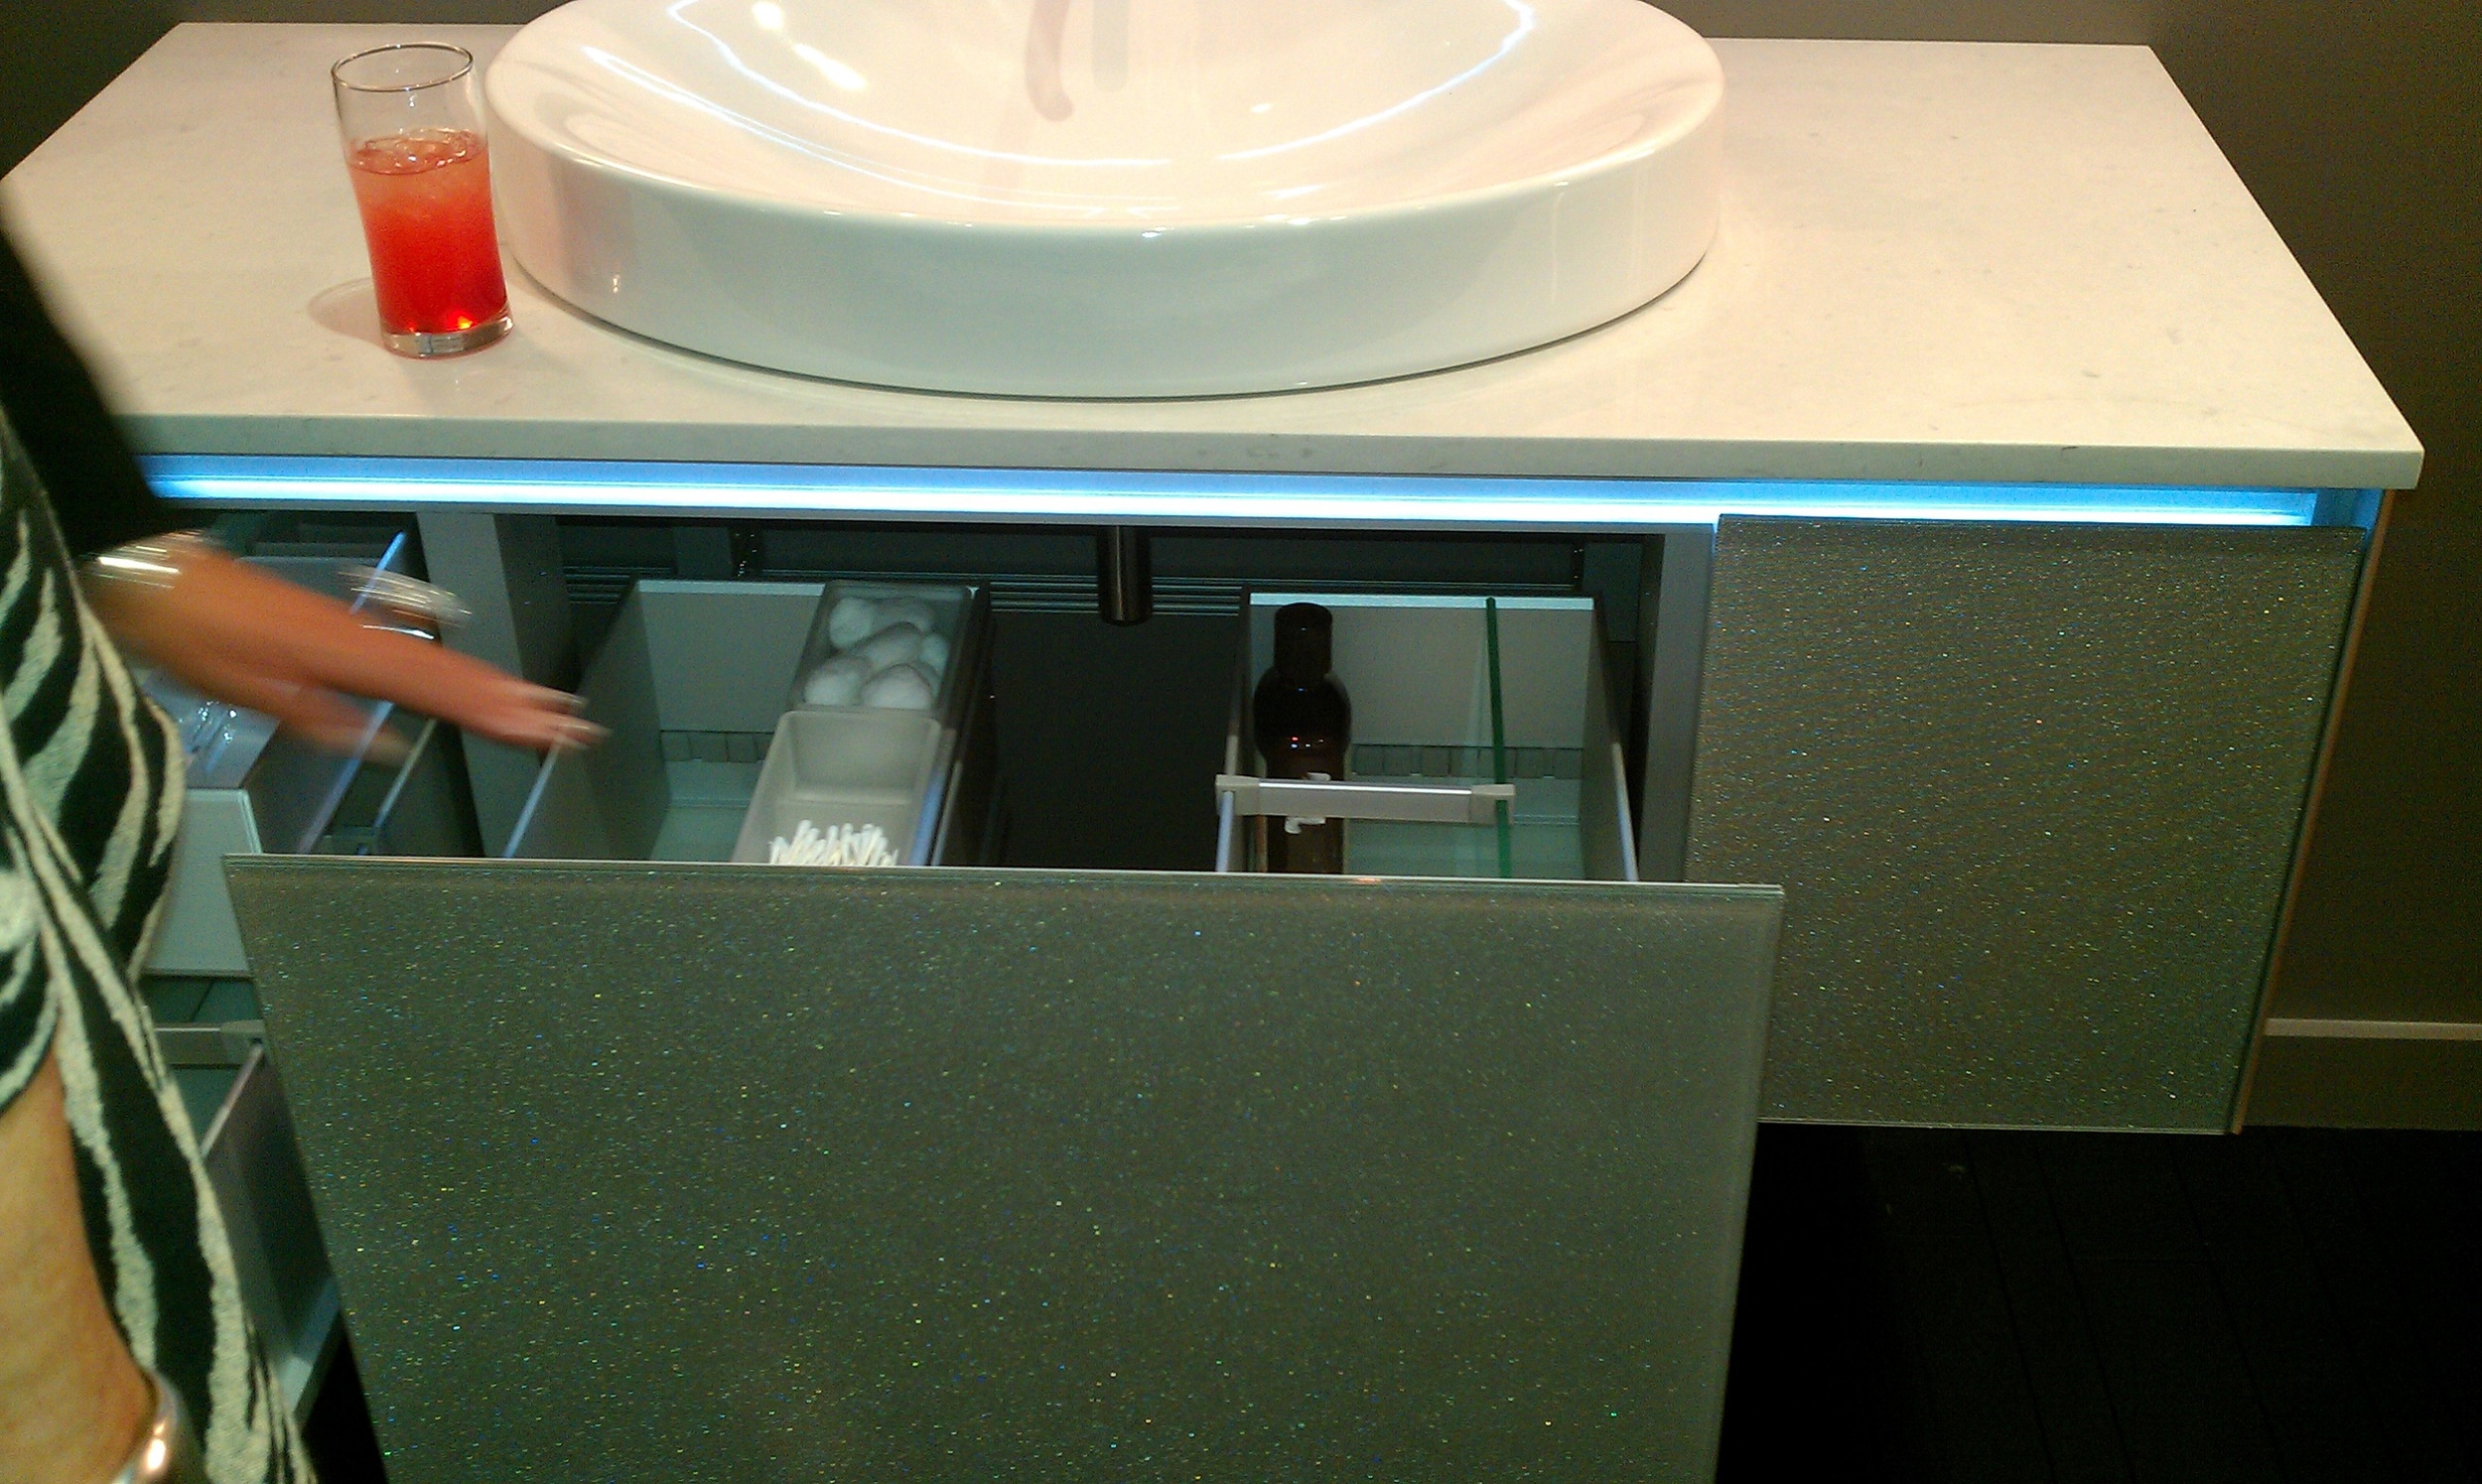
Robern has some really great vanity cabinets on display. Honestly, I had no idea their product line went beyond the medicine cabinets they are so well known for. The vanities have glass fronts (of which you can choose several different types of glass), divided drawers for solid organization, integrated power sources, and some really slick lighting.
Read This: Get an Extra $50 Back on Your New Toilet
Hi All, I'm sorry that it's been a while since I posted to my blog...Things have been hectic. But excuses are a dime a dozen right?
For those of you thinking of remodeling your bath - If you're pretty sure you're going to do it in the next six months, now is the time to go out and buy yourself a new toilet. I know, I know. This is not the sexiest blog topic to write about, but it's definitely worth a quick shout because it could save you some moolah on that all-so-expensive remodel.
Denver Water offers rebates on "WaterSense" Certified Toilets, washers, and sprinkler-related plumbing and irrigation items. Up until recently, a qualifying toilet would get you a nice $125 rebate. Considering that you can purchase a new WaterSense Certified toilet for under $300, it could be savings of up to 40%.
Starting March 16, 2011, all rebates will be reduced by $50. What does that mean? Go out and buy your toilet if you're considering remodeling your bathroom. Purchase it and store it in your garage. If you wait until after March 16, your rebate is only worth $75.
Project photos and more informative blogs coming soon...I PROMISE!
Remnants - An Affordable Way to Add Natural Stone to Your Bath Remodel
Granite, marble, and quartz prices vary - but most will begin at about $55 per square foot installed for the most basic stock colors. As you venture into exotics and non-stock colors, prices go up accordingly, and it is not uncommon to find slabs of granite that go for upwards of $3500 per slab. These are the slabs that look like pieces of art.
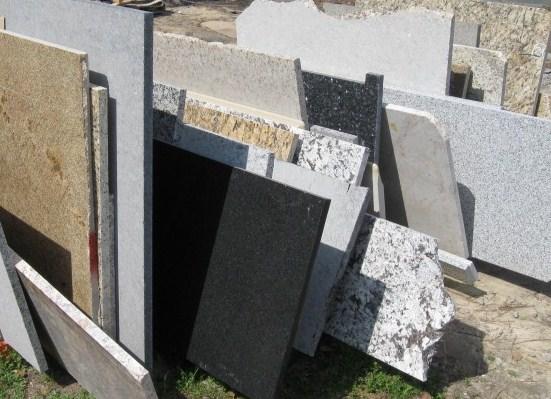
In many bathroom remodels, clients desire a distinctive stone, with unique colors and veining. However, it can be cost prohibitive to buy a full slab (slabs are usually 5' x 9' in size) when only a small piece is needed. A standard 30" powder room vanity only requires a piece of stone that measures 31" x 22".
Remnants are just that - they're leftovers from previous jobs. There are many instances where a commercial business - such as a restaurant or hotel may have a large piece of granite left over from a new installation. Believe it or not, there are also residential clients who end up with large pieces of unneeded stone from a new kitchen or a large bathroom remodel. A lot of times, they simply leave that stone with the fabricator, who holds on to it and then sells it at a deep discount to anyone who wants it.
You won't find remnants at big stone yards. Fabricators are the place to go for these pieces. For most of my bath remodels, I try to steer my clients towards searching for a remnant. Most of the time, we find something that they love and we purchase for an extremely reasonable price.
Just recently, I found a really nice piece of "Typhoon Bordeaux" granite remnant. The piece is big enough that we can use it for both of the bathrooms we are remodeling, and we got it at an incredible price.
Searching for the right piece of stone is a pretty time consuming process. It's one of the more costly items you'll spend money on during your project. Take the time to visit some local fabricators in your area before you drop thousands on brand new slabs. You'll probably be surprised by the wide selection available, and if you search long enough, you just might find that perfect piece of stone at a very low price.
Sinks for Cool People
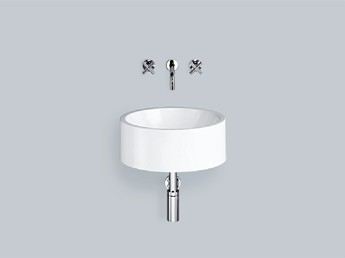
Ever feel like every time you visit a showroom, there is something new you've never seen before? The task of choosing your fixtures and fittings for the bath can become an overwhelming chore when faced with the ever growing number of design choices available. Sinks, maybe moreso than any other product, are constantly evolving. They are now created with every water impermeable substance that you can think of - ranging from bronze to wood. A myriad of shapes and installation options are also available. Wall mount, deck mount, vessel, semi undermount, undermount, self standing....the list goes on and on.
Small guest baths are a great place to make a statement. Specifying a really great vessel or lav can make the space "pop". Whereas most guests won't see your master bathroom, almost all of them will visit your guest bathroom at least once during a visit. Find a unique look for your bath and then focus the rest of the design around that piece. Spend your money on the pieces guests will use most - the lav.
Here are a few samples of new designs and some companies you may not have heard of previously. I am personal fan of Alape sinks. German engineered with glazed steel construction. Almost indestructible. Available in custom colors. Worth every penny.
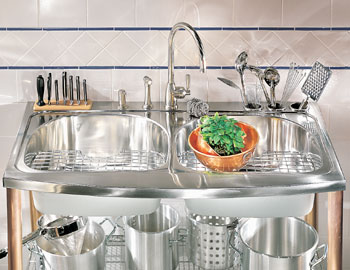
Manufacturer: Diamond Spas
Material: Stainless Steel
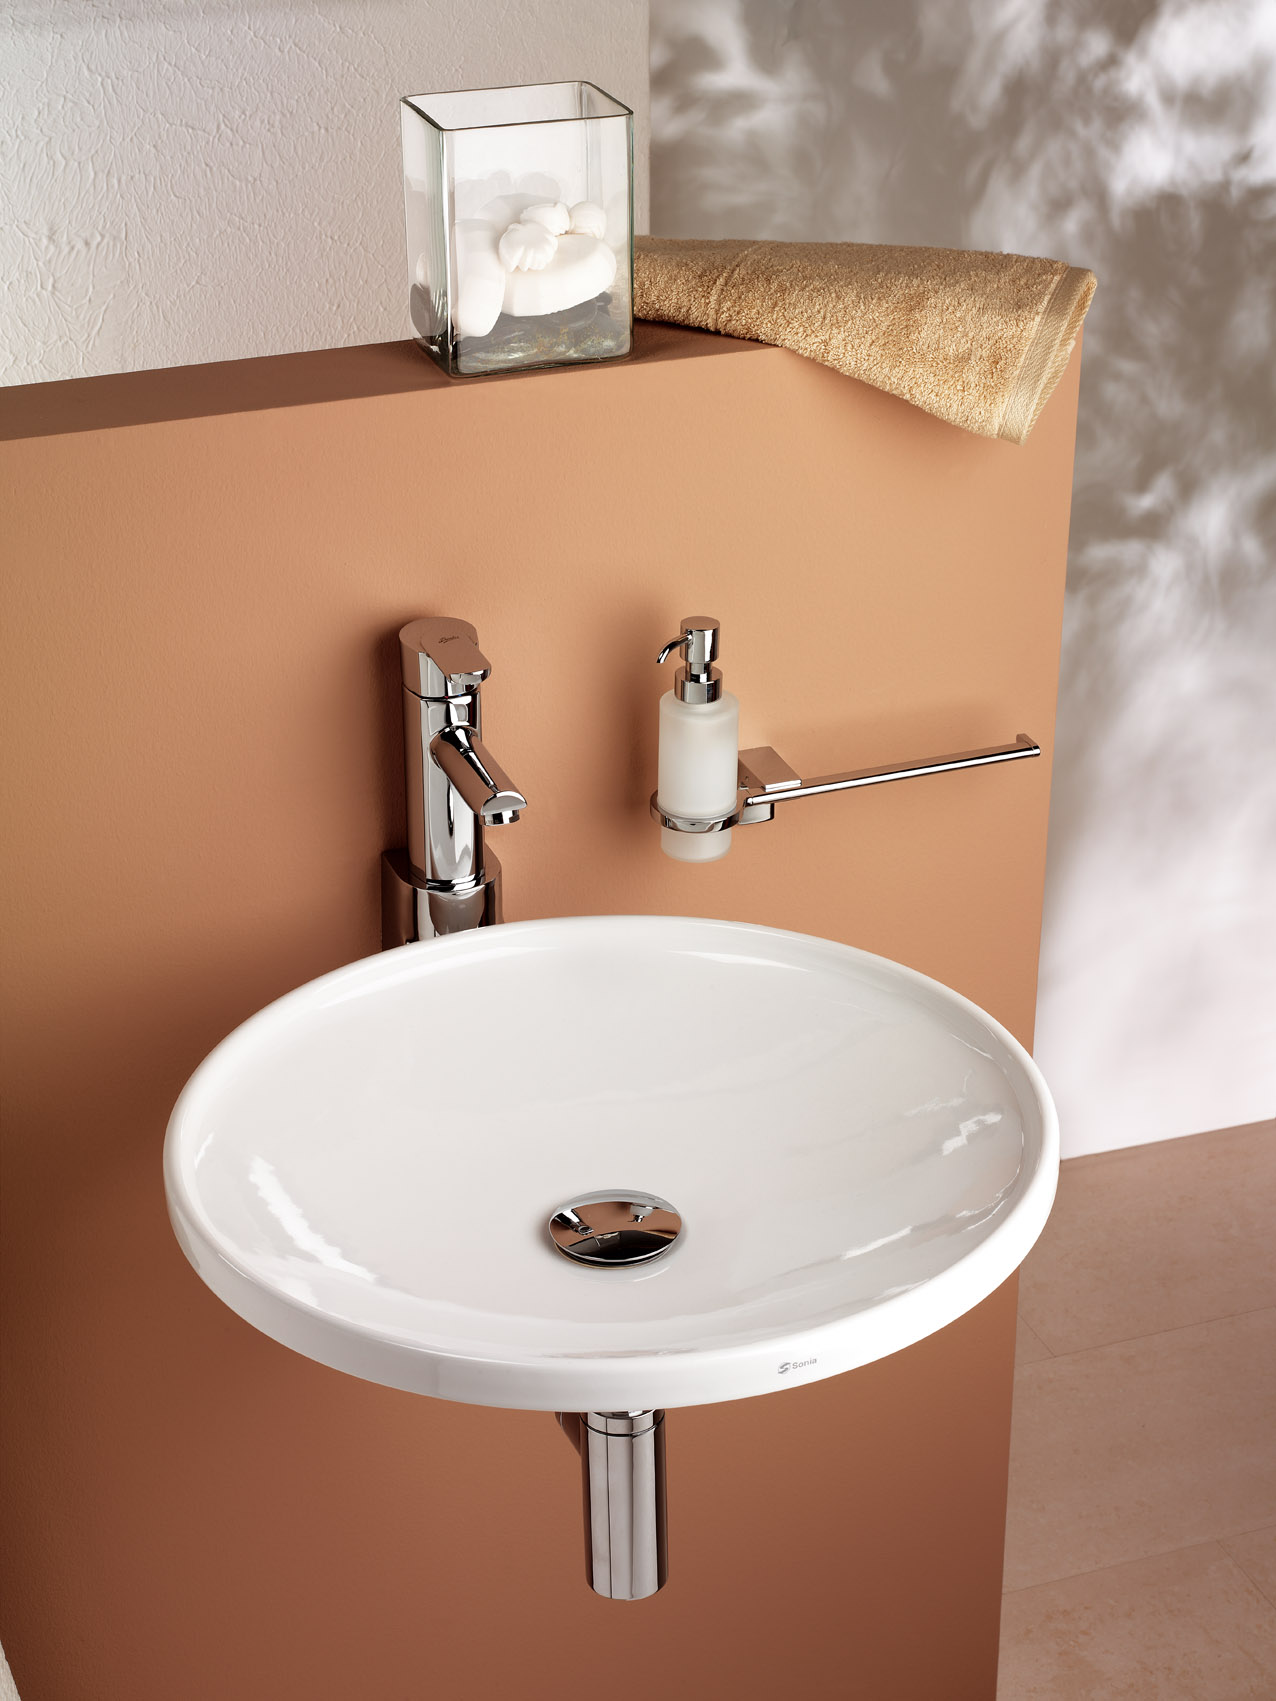
Manufacturer: Sonia
Material: White Ceramic
Name: Basin P50
Manufacturer: Alape
Material: Glazed steel, inside and out
Name: HB.R
Manufacturer: Alape
Material: Glazed steel, inside and out
Name: WT.RS
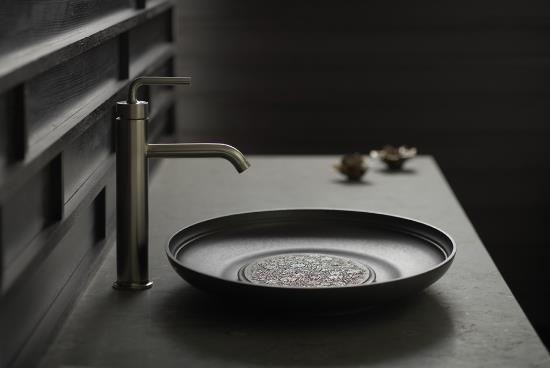
Manufacturer: Kohler
Material: Bronze
Name: Katagami
Manufacturer: Franke USA
Material: Stainless Steel
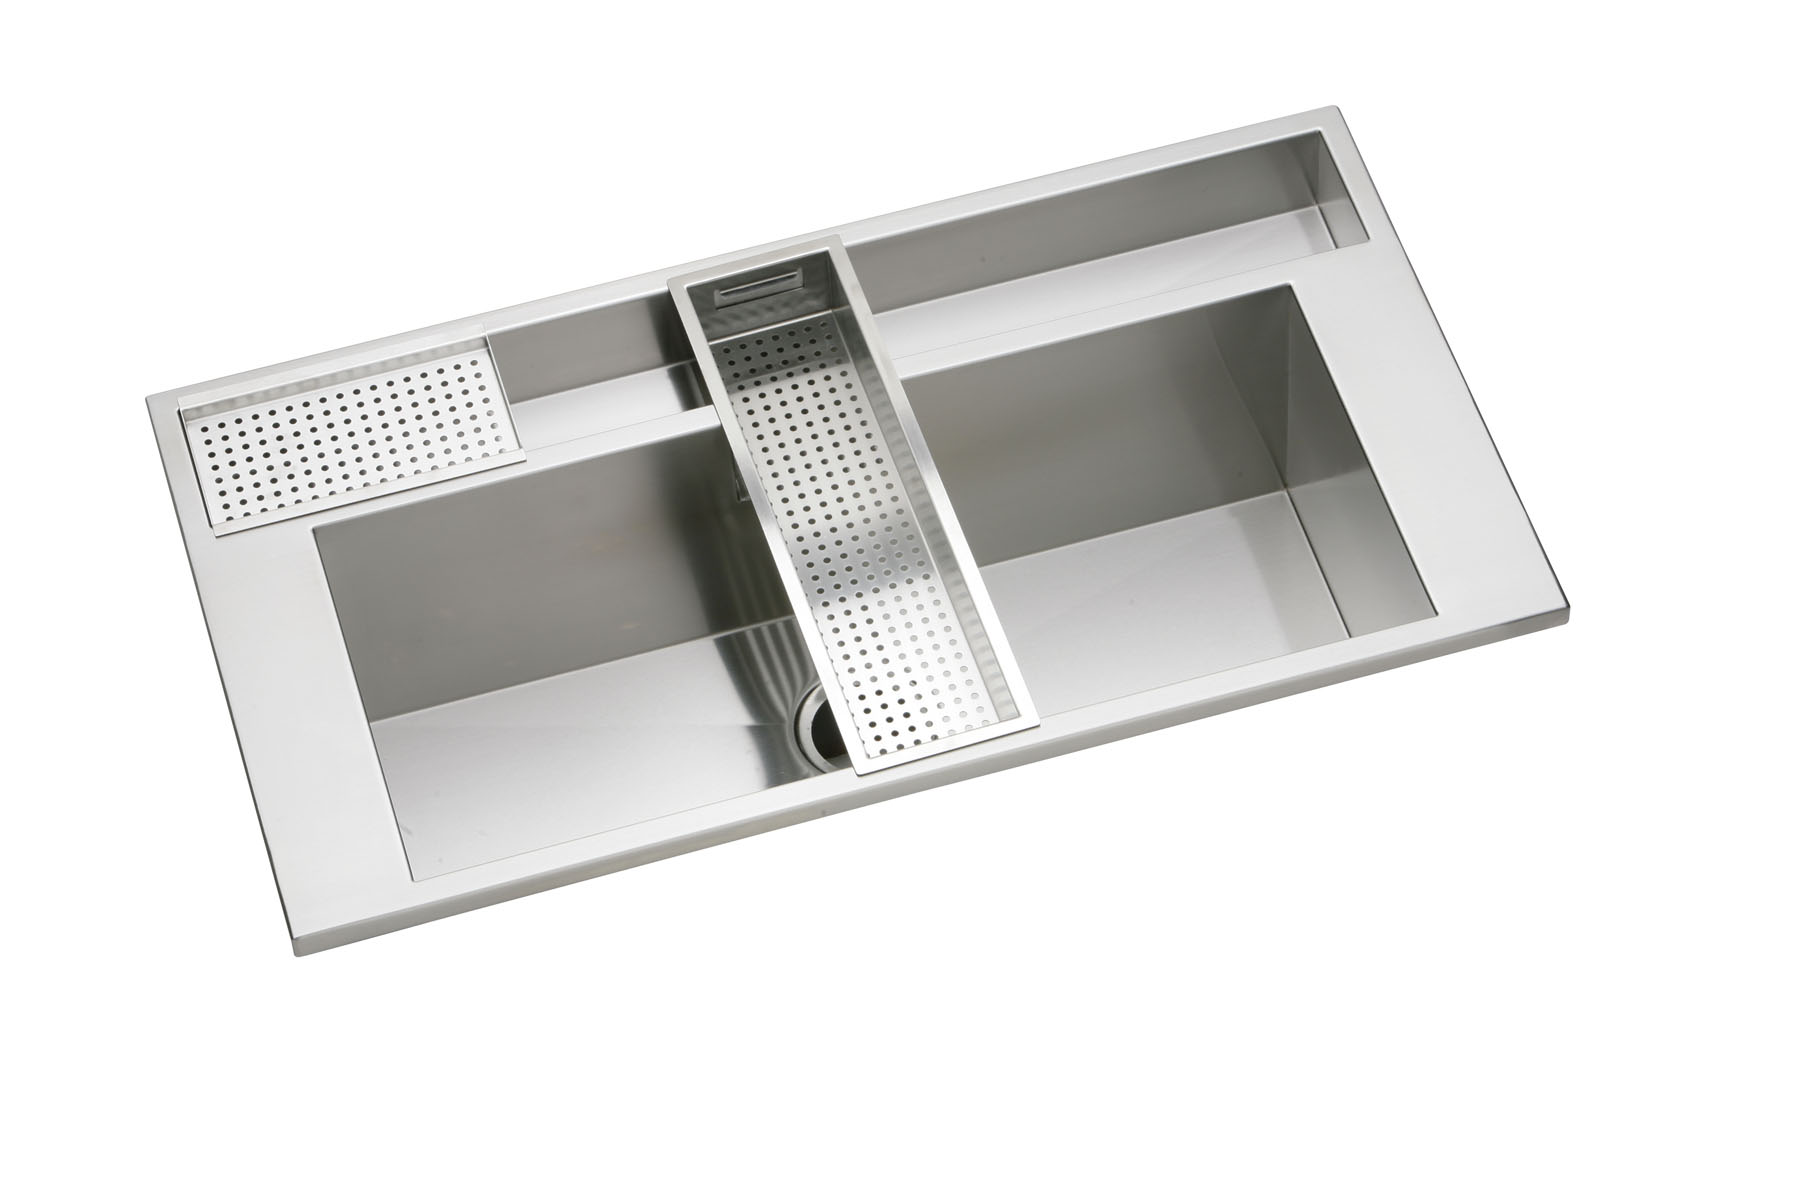
Manufacturer: Elkay
Material: Stainless Steel
Name: Avado Sink Package | EFT402211C
Integrated Appliances - What's the Big Deal?
Integrated appliances might be mystifying to some, but its actually pretty darn simple stuff.
Read More8 Steps to A Successful Kitchen Remodel - Steps 7 & 8
We're into the last two steps of this remodel, and I've yet to mention a word about the actual construction.
How can you write an article about successfully remodeling a kitchen and not mention the construction until Step 7? The truth of the matter is that at this point in the process, everything SHOULD be set into motion. You've hired your team, ordered product, and scheduled your installs. Now is the point in the process where hiring a good team will really pay off. If you've done your homework and laid the proper foundation, now is the time to step back and let the pros do their thing.
7. CONSTRUCTION
As previously mentioned, the beginning of construction is determined by the cabinet delivery date. A normal time frame calls for construction to begin around 2-3 weeks prior to cabinet delivery. Obviously, the more dramatic the structural changes to the home, the longer lead times you'll need to account for with your schedule.
Your contractor should seal off the affected areas and lay down a protective layer on the floors to and from the entry way that will be used.
Demo is followed by flooring, plumbing and electrical. Your kitchen designer should have reviewed all outlet and switch locations, specified electrical and plumbing requirements, and laid out your ceiling and task lighting. Your kitchen designer should be on site before and during any major events in the construction process to hash out any details and work around any issues that may arise on the job site. As I said before, your designer acts as your "agent" throughout the process. This is the point in the process where you'll wonder how people do a remodel without a designer.
After the floors are laid, rough plumbing and electrical is complete, and your drywall is hung, taped, and dry, you're ready for cabinet installation.
TIP: At this point, all of your finishing products should be on site. Appliances, tile, cabinetry, sinks, faucets, lighting and any other adornments which will finish the kitchen should be sitting peacefully in your garage.
Your base cabinets will generally take anywhere from 3-6 days to set in place permanently. Granted, for jumbo kitchens, or kitchens with intricate details and mouldings, this may take longer. But generally speaking, one week is standard.
Your countertops should be templated as soon as the base cabinets are set. Again, this responsibility lies with your professionals, most likely your designer.
Wall cabinets and appliance housings usually take another week. Your contractor will schedule his electrician to coincide with the appliance installer, making for a seamless day of install on the appliances.
Once cabinets and appliances are set in place, you counters will be installed. This takes one day.
What you'll notice during the construction process is that in the beginning, it will seem like things are dragging along. You won't see major differences in the space visually during the first week or two. It's not until the cabinets, appliances, and counters are set that you'll begin to walk in and say "WOW!".
On large ticket remodels and complicated projects, it is a good idea to meet with your team at the beginning of each week. The progress meetings are invaluable as a communication tool. Contractor, designer, and client will exchange progress, set goals for the upcoming week, and talk about any issues that have arisen and possible solutions. It is vital to everyone's happiness and stress levels that these meetings take place on a regularly scheduled basis.
An average kitchen remodel will entail workers in your home for 6-8 weeks.
As a homeowner, the most important thing to remember during the construction process is to stay calm, collected, and patient. Keep your communication lines open. NEVER assume anything. Your kitchen designer (if they are any good) will talk to you on a daily basis to keep you updated on progress and discuss any concerns you may have. Rely on your professionals and realize that almost no kitchen remodel goes perfect from start to finish. You're going to encounter issues. How you handle these issues will be the difference between nightmare and dream projects.
8. WRAP IT UP AND ENJOY!
You've made it this far. Your kitchen is functional and you're only seeing the occasional worker in your house now. This is the home stretch.
Now, its time to create your punchlist. The punchlist is actually a document that, once complete, will effectively complete your contract and hold you liable for any outstanding balance you owe to your contractor or designer.
Walk through your new kitchen. Test every appliance. Pull out every drawer and open every door. Check for knicks or scratches on the cabinetry. I suggest that my clients walk around with a post it pad, a standard pad of paper, and a pen. Write down everything that is not exactly right. Put a post it note on all areas where paint needs to be touched up.
You will submit this punchlist to your designer/contractor. A day or two later, you should have a "service technician" in your home, fixing all the little items that you defined in your punchlist.
Confirm that these items are complete and sign off on the job being complete. AND YOU'RE DONE!
In Summary:
A kitchen remodel is a very significant change in your home. It will disrupt your life for six months. In my opinion, the most important factor in a success vs. a failure is communication. You must voice your wants, needs, and desires to your professional team. Keeping this line of communication open is vital to achieving the vision that you first had in mind when the process began.
I hope that this article has been informative. Happy remodeling!
8 Steps to Follow for a Successful Kitchen Remodel: Steps 4-6
If you haven't yet read Steps 1-3, then click HERE.
At this point in the process, clients should have completed a few steps before moving on to the next phase of the remodel.
1. Defined a style for the kitchen
2. Set up a budget
3. Assembled a team of professionals: Designer, Contractor, Architect (if needed)
4. SET A TIME FRAME AND SCHEDULE FOR THE PROJECT
Have any of your neighbors ever remodeled a portion of their home? If so, how many of your neighbors' projects actually followed a set schedule and finished on time? You'd be surprised. Most if not all construction projects will take longer than you expect, no matter how organized you are. Hiring an experienced kitchen designer can drastically cut down on the amount of time it takes to complete a kitchen remodel. DIY'ers will find that they fall behind schedule within a few days of starting their project.
The kitchen remodel schedule is determined based upon lead times for product. Cabinetry has the longest lead times from time of order until delivery (unless stock cabinetry is used). Industry standard is anywhere from 4-16 weeks for cabinets, with the upper end of the spectrum only coming into play for true custom cabinets. Most semi custom cabinet manufacturers will require at least 6 weeks for delivery lead times.
I use the cabinet delivery date as my starting point for determining when certain deadlines must be met. This process is most easily described using a hypothetical situation.
For our example, let's assume that the cabinets are ordered on May 15. Assuming a 6 week lead time on cabinetry - we can estimate that the cabinets will be delivered to the premises on July 1.
So July 1 is our basepoint for our schedule.
Using this basepoint, we can lay out the basic schedule of events into a visual diagram. To download a PDF version of this work flow, click Work Flow
5. LET'S GET THE BALL ROLLING!
This might be the easiest step of all. Now that you've figured out what style kitchen you want, figured out your budget, assembled a team of professionals, and set a timeline of events, it's now the moment of truth: time to write the check and hire your team. I say this is the easiest step because you'll have absolutely no trouble scheduling meetings to hire your contractor and designer. I have yet to meet an industry professional who won't make time to sign on a new client.
Your contracts should be detailed in scope of work and nature of agreement. However, don't go overboard with trying to define every single detail. A schedule of work with deadlines should be included in your contracts. This will incentivize your contractor and designer to meet their deadlines efficiently. Make sure that all of your costs are spelled out.
Payment terms: Each firm is different. A kitchen and bath dealer will operate either on 50/50 terms, or on 50/40/10 terms when they are handling installation.
50/50 = 50% up front and 50% due upon delivery of cabinetry.
50/40/10 = 50% up front, 40% upon delivery of cabinetry, 10% upon completion of project
General Contractors have all sorts of payment terms. The main rule to remember is that you do not pay 100% of the labor up front. Always hold a small percentage as leverage and only pay when the job is complete based upon the terms of the contract. GC's employ a number of pricing strategies. There is "cost plus" which means cost of materials and labor plus a defined percentage. Some contractor work on a "contract" basis, in which the costs are laid out in the beginning.
6. ORDER FINISHING PRODUCTS
Each project is different and unique. Client A may want to shop around and purchase their own appliances because they have the time to commit to it. Client B may ask their designer or contractor to supply the appliances because they are frequently out of town and don't have the time nor resources to find the appliances themselves. Early on in the process, think Step 3 or 4, you should determine which finishing products you want to source yourself, and which ones you prefer to have a professional source for you.
Cabinetry
Tile / Flooring
Appliances
Hardware
Countertops
Paint
Fixtures
It is vital to the timeline of events that any finishing product you are planning on sourcing yourself is ordered well ahead of time and on site when construction begins. I have seen many jobs held up for weeks (or months!) due to a sink having not been ordered with enough lead time. Check the lead times on the products you are interested in ordering yourself. If you plan on starting construction in a month, but the faucet you desire is on backorder for 12 weeks, then maybe you should reconsider the faucet or push the construction timeline back a bit. I have had clients buy cheap temporary faucets in this type of situation before.
The main point here is to do the up front research on the products that will finish your kitchen. Make sure that what you want is either in stock or able to be delivered within a timely manner. Taking the time to go through this process in the beginning will save a lot of headaches.
Exotic finishes or materials are almost always special order. Special order can mean anywhere from 6-12 week lead times. Have you selected a slab of granite that has a particularly high content of iron? If so, you're fabricator may need additional time to order special cutting blades to get through the stone. It never hurts to ask "when can I get it?".
Up next: CONSTRUCTION and COMPLETION
8 Steps to Follow for a Successful Kitchen Remodel: Steps 1-3
The cabinetry is hopelessly outdated, your appliances are on their last leg, and you're simply tired of not having the amenities that you want in your kitchen...
You've torn out pages from design magazines, casually browsed for new appliances, and talked endlessly about the possibilities for your new kitchen. So when the time comes to finally put those thoughts and aspirations into motion, where do you begin?
What steps ensure that your finished remodel will actually bare some resemblance of all the visions in your mind?
It can be a daunting challenge - remodeling a room in your home. The kitchen, no doubt, is the most used, and most viewed space in your home. Whereas a small design mistake in another room in your house, perhaps the study, may go unnoticed by yourself and others, a mistake in the kitchen will rear its ugly face every day. It can't be stressed enough that proper planning in the pre-construction phase of the project is the most important aspect of any remodel. This is amplified ten fold for a kitchen remodel.
Where to begin??!
As a kitchen and bath designer, I have had the opportunity to work on some amazing remodels. There are some basic rules, or steps, that I follow during every project and I have found that sticking to these steps is a very effective way to ensure that all of my projects are conceived fully, run smoothly, and achieve an end-result that is pleasing to my clients.
As a general rule of thumb, if you follow these basic guidelines, it will greatly increase your chance of completing a successful remodel.
1. WHAT'S YOUR STYLE?
Whether it is contemporary, traditional, french provincial, arts and crafts, or any number of other styles, you'll need to identify what sort of "feel" you want for your kitchen. You may not know what your style is until you see it. Flip through magazines, browse websites, take note of your neighbors' kitchens. Pull out pages from magazines, print pictures from websites, and assemble a folder with all of these items. It may be a certain color that you saw on in an advertisement for cabinetry, or a door handle that you saw in your neighbor's kitchen. Whatever it may be, take note of it. These design choices will come together and identify the style you're interested in.
If you already have a clear vision of what style you want to achieve with your new space, then you're already ahead of the game.
Textures, colors, and materials all play a role in the style of the kitchen. For instance, if you're looking for a "mountain" feel for your space, consider rustic woods such as knotty alder. Consider a painted white finish or cherry / maple specie for a traditional kitchen.
2. WHAT IS YOUR BUDGET?
Usually, one of the first questions that you should talk honestly about is your budget for the project. Consider that an average sized kitchen can be remodeled from $25,000 to $250,000 depending on the materials, scope of labor, design fees, and appliances.
The overall cost of a kitchen remodel is usually somewhere between 12% - 20% of a home's value. Using a hypothetical situation, we will use a $500,000 home value and 15% variable for the overall budget = $75,000 overall budget.
Using the hypothetical situation above, we can break down the remodel into the major components, and the amount of the budget that is typically used for each area.
40% Cabinets: $30,000
15% Appliances: $11,250
8% Countertops: $6,000
7% Floors: $5,250
5% Lighting / Electrical: $3,750
3% Tile: $2,250
2% Sink/Faucet: $1,500*
20% Labor: $15,000
*assumes one sink/faucet
Figuring your budget and being realistic will make the entire process run more smoothly from start to finish. You will have the ability to be up front with your contractor, your designer, and your self in the early stages of the project. Knowing budgets helps the contractor in choosing his materials, and it will guide your designer in his/her drawings so that the space comes in at or beneath your budget.
Obviously, choosing higher end products in one category will mean you will have to choose lesser priced materials in another. This is usually the case.
3. ASSEMBLE YOUR TEAM
I can't stress this enough. No other factor in the entire process will make or break your project faster than assembling the right people for the job. Spend the time up front to find experienced, reliable, and proven professionals to come on board for your project. But this still leaves the question, what kinds of professionals do you really need?
1. Kitchen Designer
2. General Contractor / Builder
3. Architect*
*Architects are usually only employed when major structural changes are called for.
DESIGNERS: Hiring a designer is the first step here. Your designer will be your "agent" throughout the entire process. They quarterback the entire project from start to finish. They will help you finely tune your vision and will be able to provide cabinetry, countertops, appliances, tile, and flooring. Employing a designer is vital to a project's success. A great place to start your search for a Kitchen and Bath Designer in Denver is the National Kitchen and Bath (NKBA) website. CLICK HERE
GENERAL CONTRACTORS / BUILDERS: Most likely, your designer will have a list of preferred contractors or builders that they work with on a consistent basis. However, it is up to YOU to choose your contractor. RULE: Always interview at least three general contractors before choosing one. You may have a family member who recently did some work on their house and was 100% satisfied with their contractor. Get a referral. The best way to actually gauge a reference is to speak to someone who is currently having work done on their home. Ask them how things are going. Is the project on schedule? Is it within your original budget? Do the workers show up on time and behave appropriately while on the job? The more information you have the better, so don't be afraid to ask questions. General Contractors are responsible for pulling building permits, all plumbing and electrical, painting, and flooring. Each project is different, so you may only employ them for certain pieces of your remodel, while sourcing the other pieces elsewhere.
ARCHITECTS: Unless you are planning major structural changes to your home, i.e. an addition or full house gut, you probably will not need an architect. However, if your plans call for major structural work in any part of the home, it can be a good idea to employ an architect. Here is a list of Denver's AIA certified architects: CLICK HERE
NEXT - STEPS 4-6

