denver kitchen design

12' Solid Wood Island Countertop Anchors this Kitchen

This spectacular island countertop is solid cherry wood. It measures 2-1/2" thick x 140" length x 45" width.

There are several radius details along with arcs on both ends and custom cutout for the 36" gas rangetop and integrated downdraft.  Needless to say, I spent a lot of time designing this piece and spent more than a few restless nights worrying about the details of installation and integration to the island.  Fortunately, our shop did a fantastic job creating the top and it turned out stunning.

But enough about the island countertop.

The design of this kitchen evolved over time.  We began with a standard galley kitchen and decided to open up the kitchen into the main living room, which ended up being a great idea.  There is more than enough room for two chefs to work simultaneously here and not bump into each other.  The Sub Zero armoire is 9' tall and mirrors the height of the tall pantry / microwave cabinet on the opposite side of the room.[gallery columns="2" type="rectangular" ids="669,670,671,672"]

European Styling in the Heart of Cherry Creek

I knew this kitchen would turn out wonderful when I first met the client.  She was open to exploring the options available in new materials and was more than willing to "go that extra step" with the design that took it from great to amazing.  The tall and upper cabinetry is a high gloss gray laminate and the base cabinetry is a composite rift cut white oak veneer with a custom stain on it.  This was a difficult kitchen to plan for, as we had to order the cabinetry from two different manufacturers, yet make it look seamless.  I think we accomplished this feat to perfection. These photos were taken by yours truly so the quality isn't fantastic.  We plan to professionally shoot this project in about a month though, so I'll post those photos as soon as they're available!

[gallery type="rectangular" ids="663,664,665"]

Cooking appliances:  Wolf induction cooktop, island hood, and oven/microwave.  Sub Zero refrigeration.  All integrated and all very sleek.  We raised the dishwasher in a custom cabinet to elevate it 12" higher than normal.  It is very easy to get into and out of.  That sort of configuration is not always doable and is based on the space available to us.  In this case, it worked perfectly - so why not??

The perimeter stone is quartz and the island is honed granite.  Stainless steel upstands and back-painted glass doors also add to the character.

A Traditional Kitchen Remodel

The clients, in Centennial Colorado, were interested in garnering more prep space on the countertops, updating their look, and most importantly increasing the functionality of their kitchen.  It's a difficult space!  With multiple openings, and only one true wall to work against, it was definitely a challenge coming up with a design that would satisfy all of their needs.

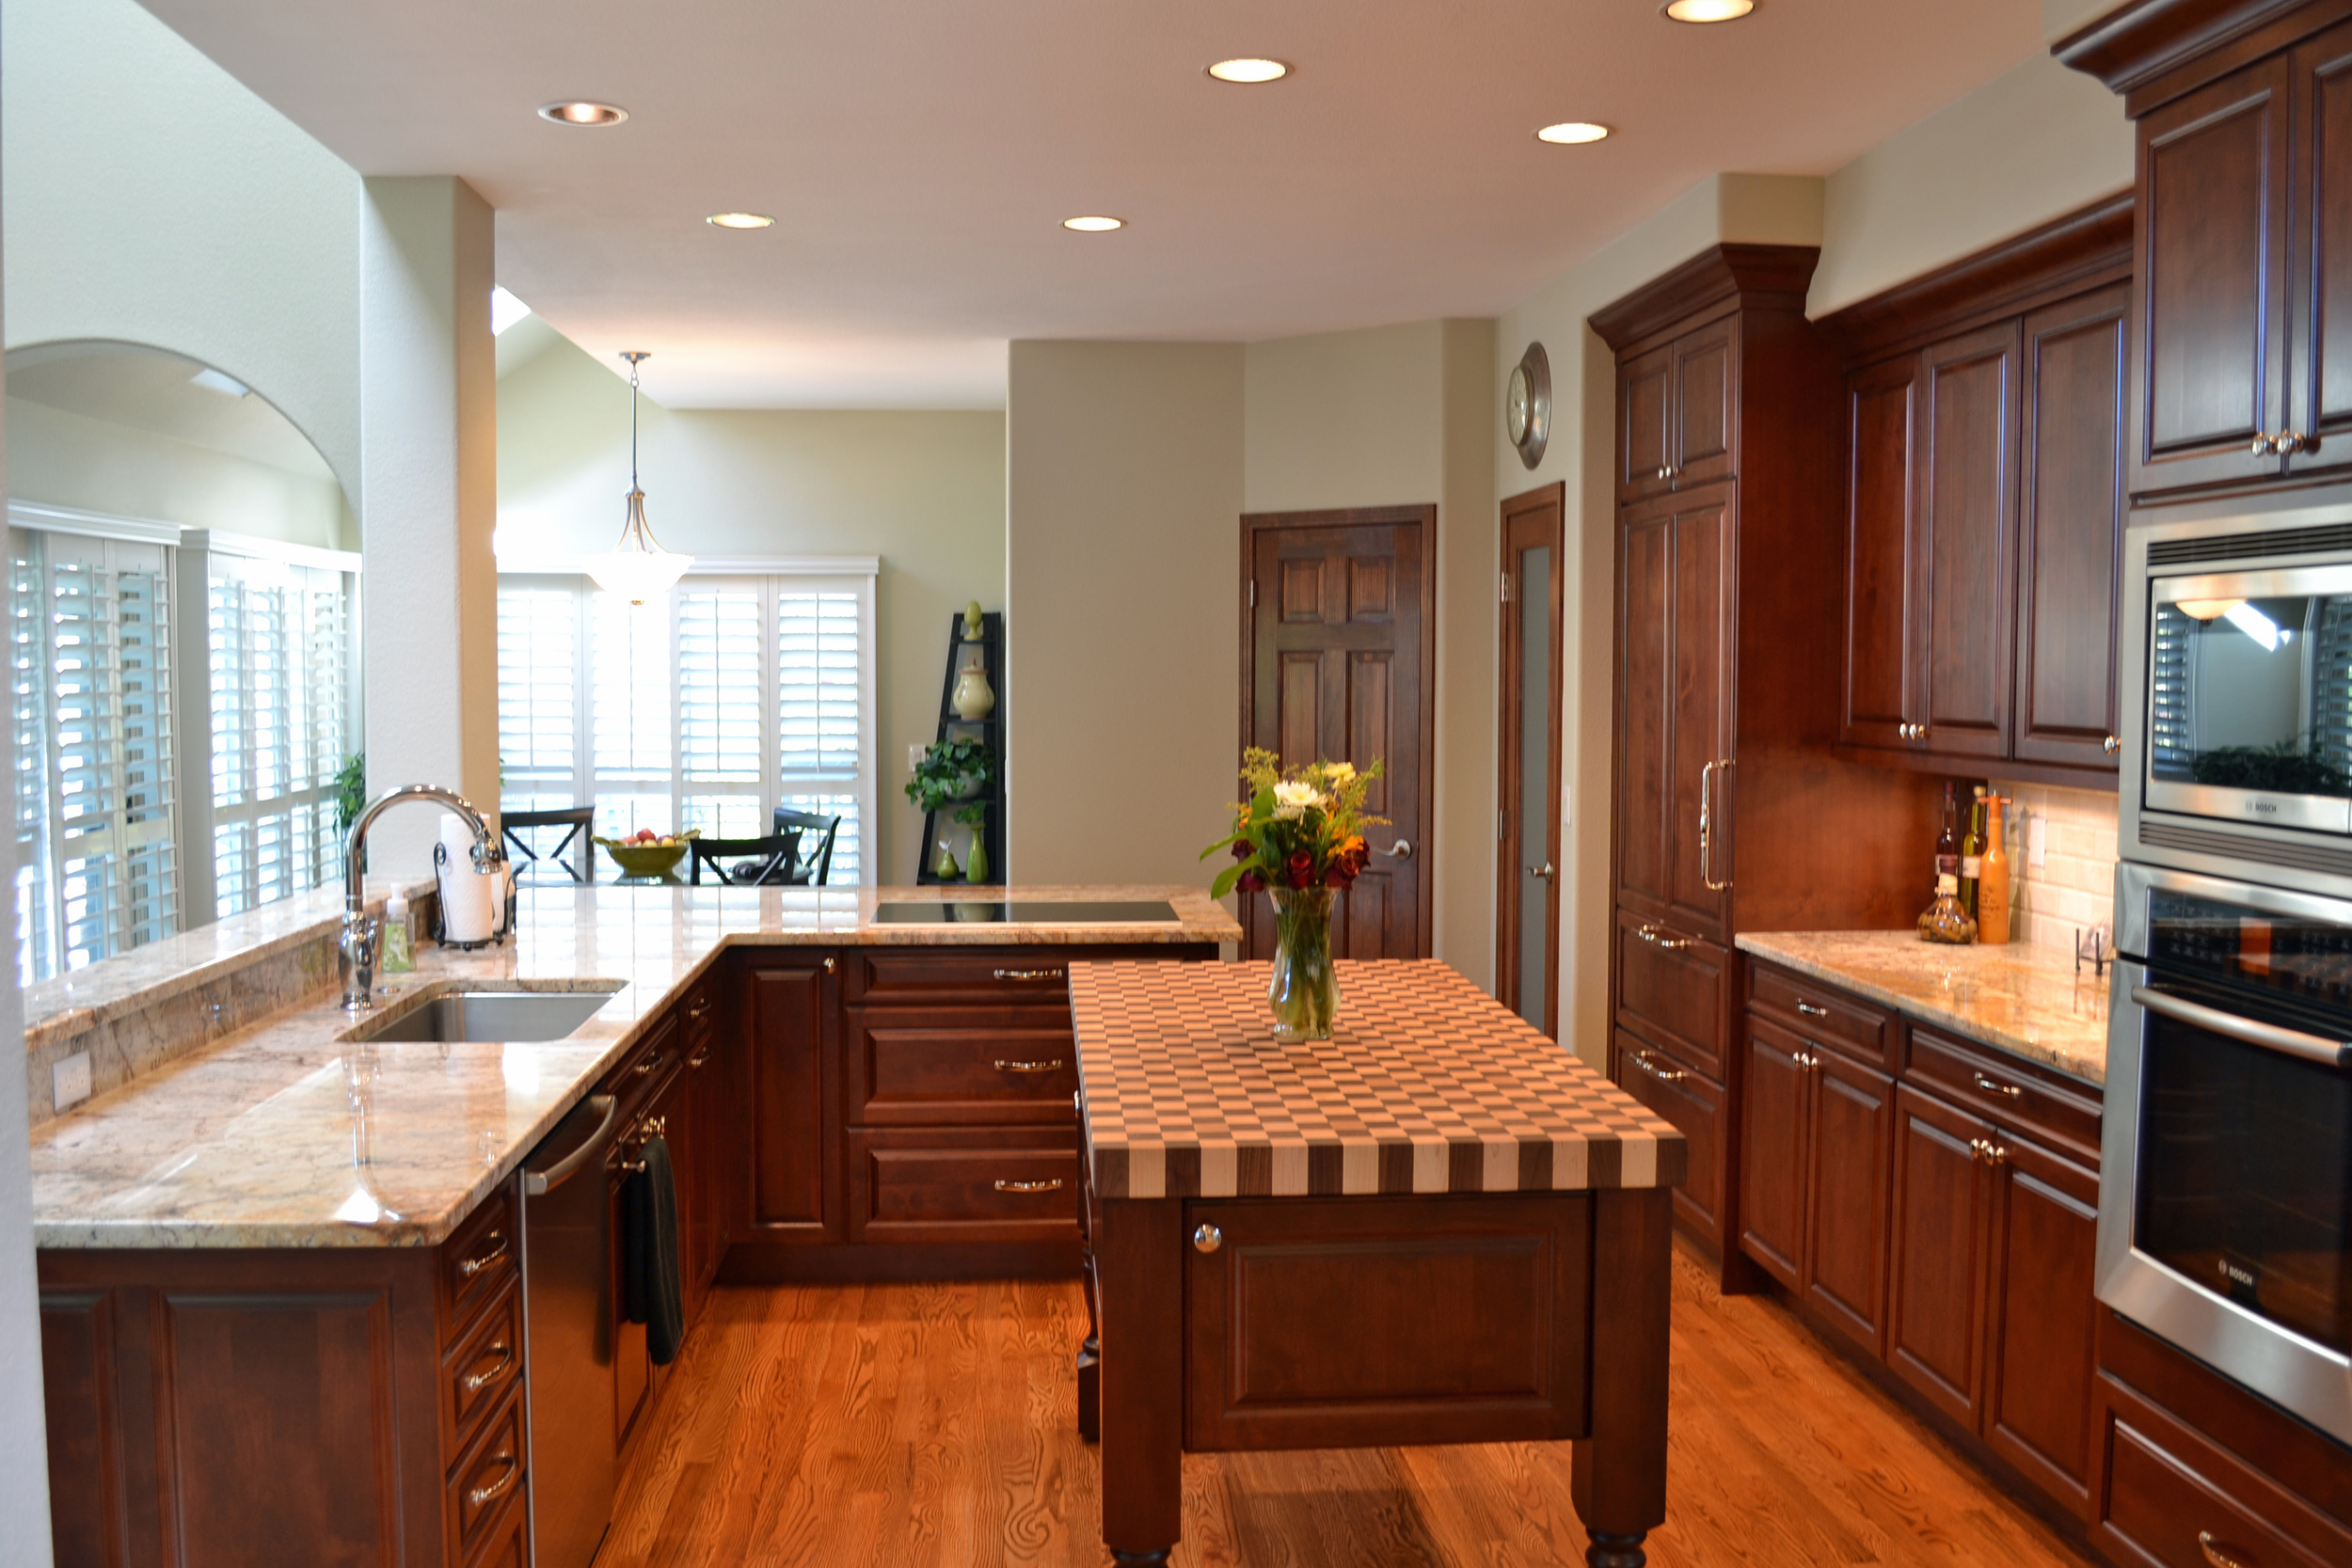
The old kitchen was white, builder grade.  The induction cooktop was located on the island, and their previous peninsula, to the right of the sink was desk height and awkward.  There was a serious lack of preparation space.  By stealing space from a pantry and walkway into garage, we were able to add seating for 4 people comfortably, take the cooktop off of the island, and add much needed counterspace to the back wall.  One of the biggest structural changes we made was removing a stand alone coat closet in the middle of the house.  You can see the difference it makes in the before/after pictures below.

The backsplash tile is a 3 x 6" polished limestone that we found at Decorative Materials in the Denver Design Center.  I wrote about this tile here, and it ended up being the perfect compliment to the Typhoon Bordeaux granite.

The true star of the kitchen is the 2-1/2" thick butcher block top.  It's a combination of walnut and maple, end grain.  This top was painstakingly created in Pennsylvania and shipped to Colorado, where it sits atop a mobile island.  Yes, the island is movable.  We sourced low profile casters and installed them on the bottom of each island post.  The result is a space that is truly multi-functional and very friendly for two cooks.

[gallery type="rectangular" ids="627,628,629,630,626,625,622,621,623,624"]

What is Induction Cooking?

InductionWhat does it mean, and how does it boil water faster, and more efficiently than gas or electric burners?

Will your current set of pots and pans work with a new induction cooktop and how can you be sure?

Why should you consider induction cooking for your kitchen?


I know.  It's strange.  It's a little different way of thinking about cooking.  For those of us that can let go of our preconceived biases regarding gas burners and how they outshine and outburn everything else, induction might be a perfect fit for our kitchens.

How Does Induction Work?

 Induction occurs when heat is "induced" into a piece of cookware by an electromagnetic field.  The "element" is a high frequency electromagnetic unit that is situated underneath the ceramic or glass cooktop surface.  (see the picture to the left- It's the coils!)  Induction uses sophisticated electronics in the element to generate electromagnetism.  This magnetic field is very strong.  When a piece of magnetic material - such as a frying pan - is placed on top of the cooking surface, the magnetic field is transferred to the pan.  This magnetism agitates the molecules at the very core of the pan's makeup and they begin to shake and vibrate very quickly, producing friction.

Have you ever pulled your hands too quickly along a rope and gotten a burn?  That's friction.  The heat that is released (and burns your hands) is the same type of heat that the induction cooktop uses to cook that bacon you've been salivating over all morning.

Here's the main thing to take away:  induction cooking transforms your piece of cookware (a frying pan, for example) into the actual cooking surface.

Yeah, it Sounds Great, but How Does it Perform?

There are three aspects to this.  How fast does an induction cooktop heat up?  How controllable are the temperatures?  How about energy efficiency?

Let's start with energy efficiency.  Hands down, induction is simply the most energy efficient way to cook that exists today.

On average, induction cooking is 85-90% energy efficient.  That means that about90% of the energy produced is actually delivered to the source.  Gas, on the other hand is only 40% efficient!  Most of the heat generated is lost between the time the flame is turned on and the point at which heat is delivered.  Induction is TWICE as efficient as gas when it comes to energy delivery.  WOW.

How about controllability??

Well let me tell you.  It's just as easy to control an induction cooktop's heat as it is gas or electric.  I don't have any statistics to show you, but I can say from experience that it is very easy to control the heat source.  You can still simmer your Gramma's sauce all day without burning the pot.

I've Heard About Induction's Ability to Boil Water Quickly, but Exactly How Fast is it??

It's not just boiling water.  The example of how fast it takes to boil water is just the easiest visual for most of us.  So how fast is it?

The following times are based on the time to bring to boil 2 QUARTS of water

Induction: 4m 45s

Gas: 8m 18s

Electric: 9m 50s

Induction is just about twice as fast as the next best option.  I think this is pretty self explanatory, so I won't go into more detail about it.

Will My Pots and Pans Work with an Induction Cooktop?

There has been a lot of backlash against induction because of a misconceived notion that your current set of pots and pans will not work with it.  That may be a little bit true, but for the most part, it is not.  It is also a widely held belief that you need to spend hundreds and hundreds of your hard earned dollars on a new set of "induction-ready" pots and pans.  That also, is not true.

How can you determine if your pots and pans will work with an induction cooktop?  Simple.  Take a magnet and place it on the bottom of your cookware.  If it sticks, your pot will work.  If not, then you need to go shopping.

Don't be conned into paying an arm and a leg for an expensive set of cookware if you don't really want to.  There are plenty of induction ready cookware sets available at places such as Costco that won't burn a hole in your pocket.  As with anything though, you get what you pay for.  Many cheaper pots and pans have "hot spots" or non-ergonomically designed handles.  These may work with an induction cooktop, but you may not get optimum performance out of them.

How to Build Wainscot Paneling

Wainscot paneling is something I used to do a lot of when I lived in the Northeast.  It's found in many older traditional homes, and is often replicated in remodels and new construction to achieve a warmer feel for a space and add interest to otherwise plain walls. Wainscot comes in many different heights, styles, and variations.  It can be created with a variety of materials, but wood is mostly used for the construction.

Originally, wainscotting was used in 16th century English homes to combat rising dampness.  England has a very humid and damp climate, and this was one method that early builders used to fight mold and mildew that would rise up out of the ground and infiltrate the lower portions of walls in homes.

Now, it is used mainly by designers and builders to adorn the walls of upscale homes.  It is traditionally painted or stained and, like I said, can come in many different variations.

Steps to Create Wainscot

1.  Rip your horizontal rails to the desired width.  If you are planning on a 3" exposed rail and you have a 4" baseboard, then your rails should be ripped at 7", as the rail will be applied first and the baseboard attached to it, flush to the floor.  Use 3/4" thick MDF (medium density fiberboard) or paint grade plywood if you are planning on painting your wainscot.  If you desire a stained wainscot, then take care to select only the best boards for your material, as the stain will accentuate any grain patterns or defects that are found in the wood.

2.  Mark stud locations on wall.

3. Draw level lines at the desired heights and then nail your wainscot to the wall at the locations where you previously marked off studs.

4.  Next, mark off your desired locations for vertical stiles.  Nail these into place as well, and be sure to apply ample wood glue to the ends that will abut the horizontal stiles and rails.

5.  After you have nailed your stiles and rails to the wall, you'll have a pretty good idea of what the end product will look like.  Miter your chosen panel mold or inside profile into the panels, per your design.

6.  Add your chair rail and cap mold.  Here's where you can get creative.  There is no set way to build wainscot.  Take your time designing and drawing before you start any nailing or building.  Draw the panels out on the wall to ensure that you like the size and shape of them.

7.  Finally, all of the nail holes and joints will need to be filled with putty and sanded to a smooth finish.

8.  Your wainscot will need to be primed first, and then painted with a minimum of two coats of paint.  I recommend spraying the paint, as brush application will take a very long time, and the sprayed finish gives a very uniform even coat.